
As good as drop-down pick lists are, there are times when you might want the ability to addset of multi-select checkboxes to one of your forms. A set of multiselect checkboxes can make for much faster service entry for your users and is useful in form design to show views of the form what options were available so that they can see what was selected as well as what was not selected.
Creating a multiselect checkbox is not as easy as adding other types of control to your form in the form designer. You will need to create a subform for your main form and perhaps a user-defined look-up table.
The instructions below are going to go through the entire process of setting a fully user-defined multiselect form control but you can use the driving form line in other scenarios if it suits your purpose.
Step 1 – User Defined Lookup Table
For my scenario, I need to create a multi-select checkbox list of types of restraints that my agency uses to support clients. This type of control is a good candidate in this situation because I cannot predict how many of the types of restraints may be used in a single incident. I do not want to have 2,3, 4 or more(?) picklist fields on my form just in case there is a situation where more than one restraint is used.
The first step is to create the list of restraints as a user-defined table.

I simply set mine up like this:
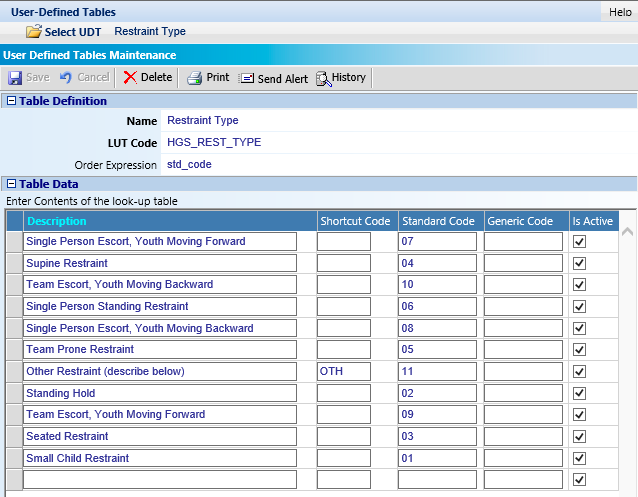
Note that I changed the Order Expression to std_code. This changes the sorting on the lookup table to use the standard code field. I then just simply numbered my options in the order I wanted them to appear on the form. The sorting is alphabetical, not numerical, which means you need leading 0’s or 17 will render before 7.
Step 2 – Subform Design
In order to create something like a multi-select checkbox control, we need to leverage a subform. Subforms have the ability to add new rows as additional selection are needed. For example, here is a subform for one or more attached documents that I have added to forms where we cannot predict how many separate document may end up being attached:
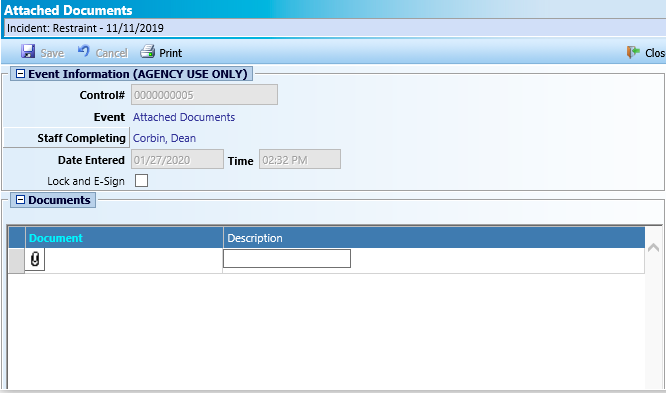
If I add an attached document, a new row is added to the subform for me to add an additional scanned document.
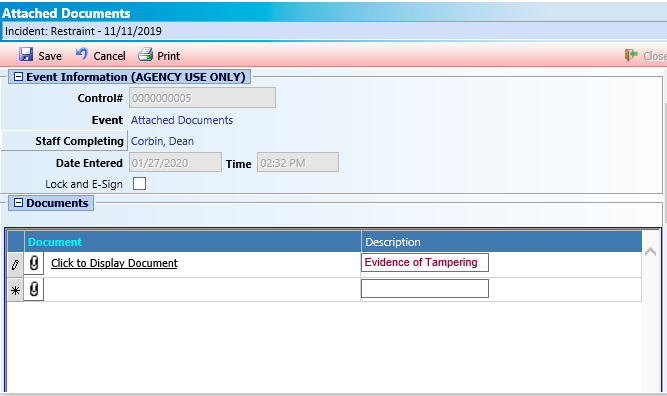
Instead of a document link form element on my subform, I could use a foreign key field that uses my new user-defined table and then I could add as many rows as needed to capture the multiple types of restraints that may have been employed in the incident.
In order to create my sub form, I need to select the right form family. There are a few options for this. You can see them in the form designer when you add a Sub Form to a form (NOT an Event Based Subform) As of this post, there are 26 form families at your disposal, although some may not actually be useful for this:
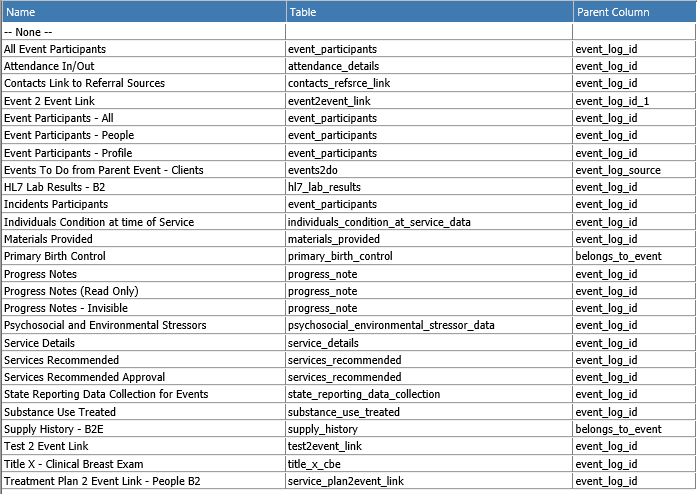
I usually choose Materials Provided because my agency does not use the materials provided functionality that myEvolv intended so there’s little danger of obtaining weird results somewhere down stream from adding materials provided to random events.
Copy the default form from the top of the list and then on your new form, you can remove all of the fields except the Event Log Id and Agency variable.
Then add a new database field to the form like this:
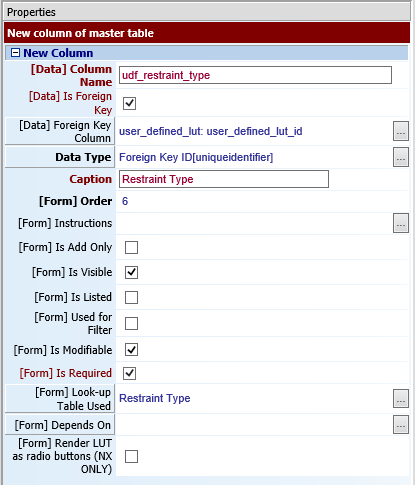
Note that I am entering user_defined_lut: user_defined_lut_id as the Foreign Key Column — this will allow me to re-use this user-defined column again on other forms. This new field is now linked to my user defined table Restraint Type.
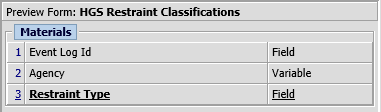
After saving, make sure that only this field is visible on subform. The other two may be hidden or at least hidden on the subform. This is what you should be left with, if using Materials Provided:
Add this subform to your main form. It should look something like this now:

This setup could technically get the job done. Users can select the gray ellipses button and add a row for every type of restraint used. However, there’s a lot of clicking involved and nothing prevents them from selecting the same one twice. Furthermore, we don’t have a sense of what all of the options are to know what was not used, only what was used.
Step 3 – Form Driving Line
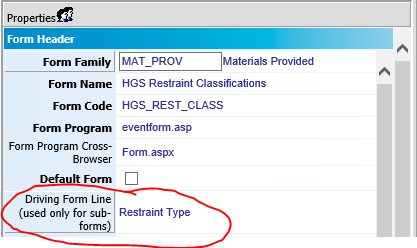
There is a setting that has been available for a while but seldom used called Driving Form Line available in the form header properties.
What is does is allows you to select a foreign key field that is on your form and use it to “drive” the creation of subform rows. It will pre-populate your subform with one row per active item in the lookup table associated with the foreign key field you selected and render each with a checkbox next to it. In the database, only those items with a checkbox checked in it will be considered selected.
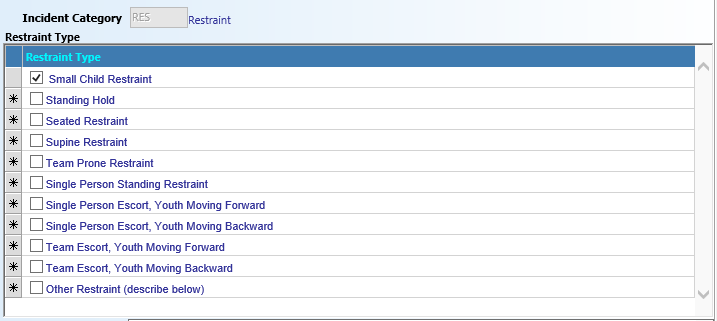
In my scenario, we will have a row per restraint type in our subform when it renders. Note that you will likely want to increase the size of the subform on your main form to accommodate all of the rows that will be rendered so that users do not need to scroll. My list has 11 items and I have found that you need 25px per item so I will use a height of 275:
Beware: because of this height aspect, you may want to limit your driving form lines to lookup tables with manageable number of options.
P.S. — Other Considerations
The scenario above is the most basic but keep in mind that you can include other columns in the subform. For example, I have another subform that gets the classification of an incident and also asks the use to select if the classification is primary or secondary.
I have a third subform using driving form line that handles information about notifications that have been made.

When you use this method with subforms that contain additional rows, keep in mind that ONLY those rows where the driving form line checkbox is checked will save to the database. This presents a risk for data loss on save that can drive users crazy. They fill in all of the columns but forget to check the box and now they have to re-enter everything.
It is therefore recommended that you use the following JavaScript in the subform design to disable all of the other columns unless the driving line checkbox is checked.
This code should be on the disable rule property for every column that is not the driving form line column. You must provide the correct column name for the code, which is the column name for the driving form line column.
!SubDisableRule('udf_restraint_type', 'checked')
This is a great how-to! Thanks Dean!