
How To: Prevent Backdated Entries

This may not be the only or even best way of preventing backdated entries in myEvolv but this method worked for me in a recent configuration.

Scenario

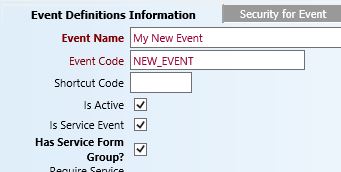
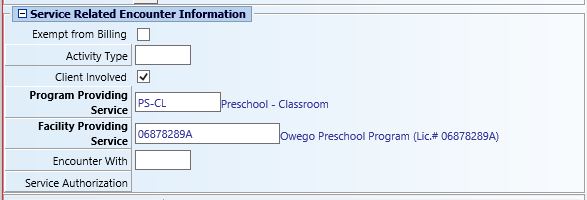
We wanted our prescribers to be able to provide a Script for Therapy Services to children in our preschool services program from myEvolv. Scripts for Service must have a start date on them and that start date needs to be no earlier than the date indicated on the child’s IEP but cannot but previous to the date that the script is being signed.

Further, an administrative assistant was going to be setting up the scripts in myEvolv and then the prescribers were going to be reviewing and e-signing them. We could imagine a scenario where the administrative assistant put a date, for example (9/1) on the script, believing that the prescriber would e-sign it on or before that date but the prescriber does not get into myEvolv to sign it until after that date has passed and then the script gets e-signed as though it were backdated. We needed a way to prevent the start date from ever being previous to the approved date while also allowing the start date to be in the future.
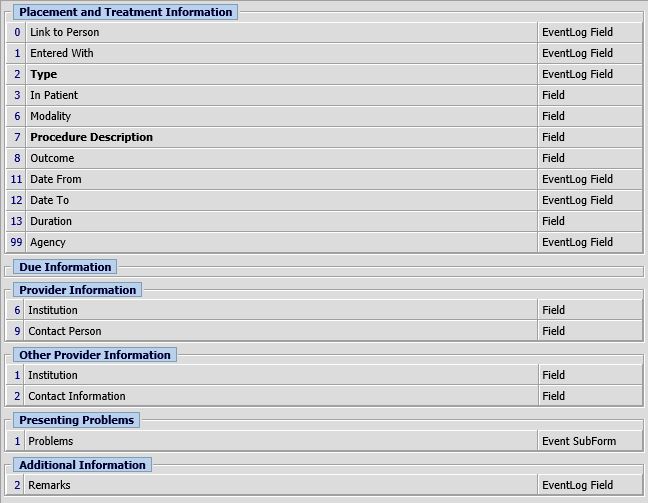
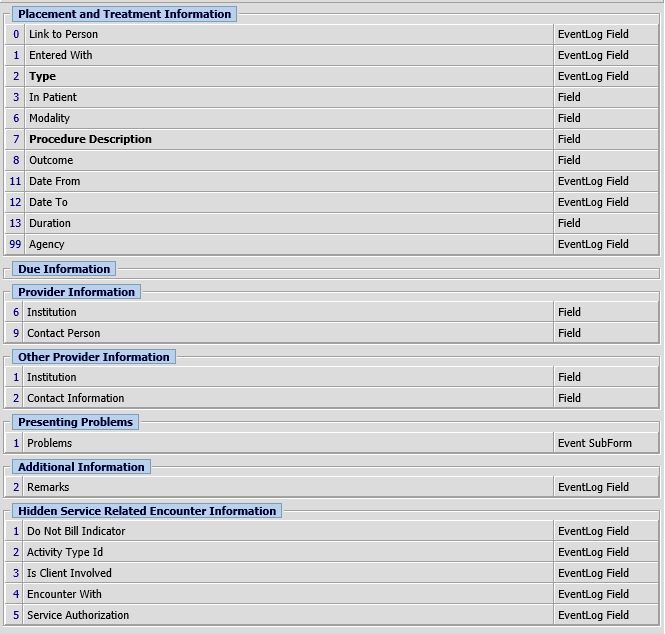
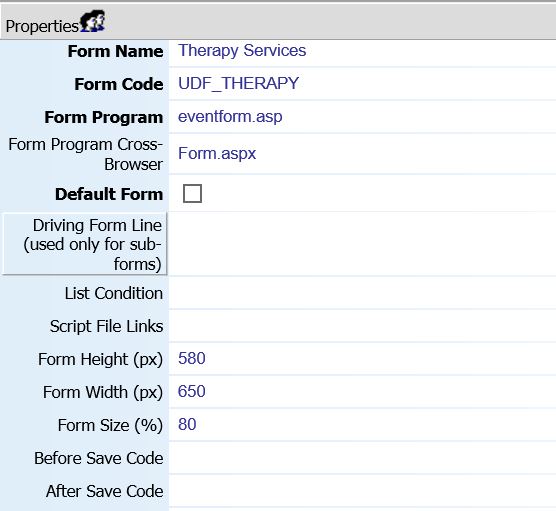
Form Design

script-for-service-form

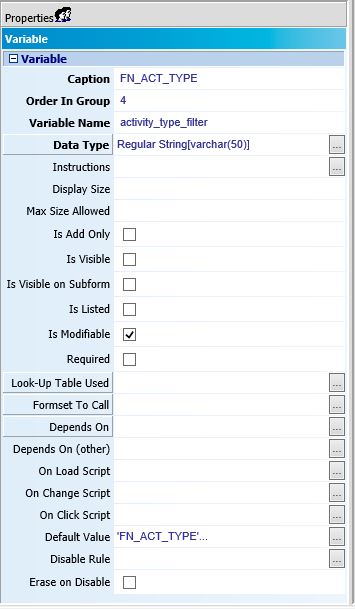
The actual_date field was not suitable for use as the script start date since we needed to be able have multiple scripts that start on the same day for an individual. If I set the actual date as ‘Date Only’ Display Type Code, then two scripts in the same day would overlap at 00:00 AM. In this case I ended up creating a new database field for my Start Date and kept actual date on the form, receiving todaysDate() as the default value. This more or less prevents the service overlap problem. My new database field is named udf_rx_4_svc_start and is Date Only.

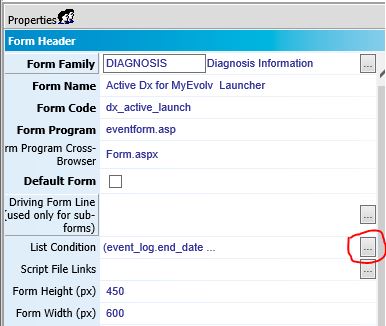
The end date on the script is using the expiration_date column and is also using the Display Type Code “Date Only”.

Before Save Code

The first task to accomplish is to prevent a user from saving the form with a backdate on it. For this I used the Before Save code property on the form. This code executes every time that the form is saved BUT because of the algorithm myEvolv uses to save form data, the udf_rx_4_svc_start column in the database will only be updated if the form field has been flagged as being modified. This is something that I was not able to figure out how to do in the Before Save code yet and is largely responsible for what feels like a more-complex-than-is-strictly-necessary-solution — more on that later.

First step is to get the value that is on the form field and turn it into a JavaScript date object.
var start = new Date(getFormElement('udf_rx_4_svc_start'));

Second step is to get today’s date and turn it into a JavaScript date object. todaysDate() is a myEvolv form function that you can use to get today’s date in a format suitable for placing in a myEvolv form field.
var today = new Date (todaysDate());

With that accomplished, we can compare the two date objects to see if the date on the form is previous to today’s date and if so, set the form field’s value to today’s date.
if(start <= today){{setFormElement('udf_rx_4_svc_start', todaysDate())}};

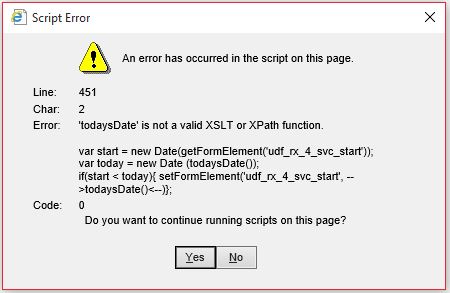
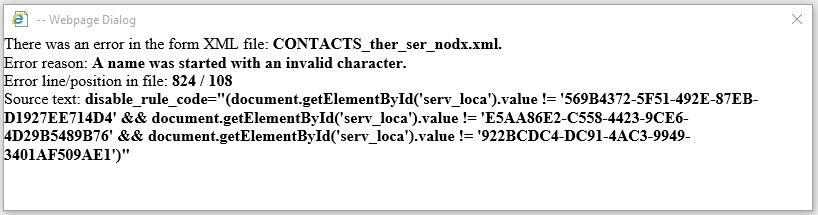
Note that the { and } brackets are doubled up in the conditional statement. This will prevent the “Not a Valid XSLT or XPath Function” error previously discussed here.

With this code in place, when a new Script for Service is entered or a draft Script for Service has it’s udf_rx_4_svc_start field modified, myEvolv will check to make sure that the start date is not not in the past and if it is, update the start date to today’s date. If the date is today’s date or a future date, it is left as it is.

Full Code Block

var start = new Date(getFormElement('udf_rx_4_svc_start'));
var today = new Date (todaysDate());
if(start <= today){{setFormElement('udf_rx_4_svc_start', todaysDate())}};

On Load Script

Just the Before Save Code alone would not be enough to prevent backdating. We still have the possibility of someone simply opening the draft and e-signing the form as in our scenario where the prescriber gets into myEvolv to e-sign scripts later than intended. Even if the form is edited in some way, if the Start Date is not touched, the Before Save code will execute but the column will not be flagged as modified and myEvolv will ignore it when updating the database. My approach here was to try to update the form as it loads upon viewing or editing so that myEvolv would see the column as modified when saving. I was unable to get the toolbar containing the ‘Save’ button to recongize the change, however, I was able to still get the desired effect another way.

The first thing to keep in mind with the On Load Script is that the form DOM has not loaded yet when this code runs. You can not therefore target the form field with JavaScript, update its value and focus/blur to make myEvolv notice a change to the value as we can with the On Click and On Change Scripts. Instead, you have to manipulate the Record XML Data before it gets loaded into the form.

The first step here is to determine whether the script had been signed. If it has been signed, it will have a non-null date_locked value. We check for this by using the myEvolv form function getDataValue() and then seeing if the form is being opened for viewing or editing.

var locked = getDataValue('event_log', 'event_log_id', keyValue, 'date_locked');
if(locked == '' && formXML.documentElement.getAttribute('formAction') == 'EDIT'){{
...
}}

This code gets the value of date_locked from the event_log table where the event_log_id is equal to keyValue which is a variable equal to the event log id of the current event you are looking at.

Then the code checks to see if there is a locked_date. If the locked date is blank AND the form is opened for editing, then it will execute the rest of the code. So basically, only perform a date manipulation if we are still working with a draft. If you leave this piece out then every time you look at a completed script for service in the future, myEvolv will overwrite the form field value for start date to be today’s date and you will be scratching your head.

Inside the ellipses we start the date manipulation. First we load the node for udf_rx_4_svc_start from the XML Record so that we can manipulate it.
node = formXML.documentElement.selectNodes("form_group/form_item [@column_name = 'udf_rx_4_svc_start']");
node = node[0];
This code returns an Array of all of the nodes in the XML documents with the column_name “udf_rx_svc_start”. There is only one but it is in an array so we load it into our variable directly on the next line.

Then we get the start date value and turn it into a JavaScript date object.
var start = new Date(node.text);

Then we do the same for today’s date.
var today = new Date(todaysDate());

Now we check to see if start date is before today’s date and if so, we will update the text of the node to be today’s date.

if(start < today){{
node.text = todaysDate();
node.setAttribute('modified', 'true');
...
}}

I also set the “modified” attribute to ‘true’ for this node. I don’t know if that makes a difference in this setup but I am including it since that is how my code is and it works.

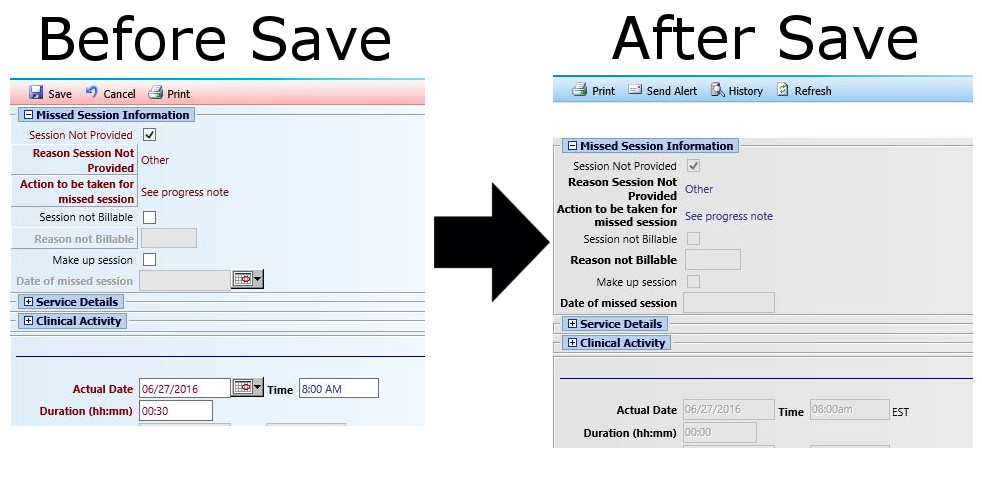
If you leave the code as it is like this, when the form loads, if the start date is previous to today’s date, the value on the form will have been updated to today’s date AND the form field will be maroon like it is when a form field is changed. However, you will also notice that the “Save” button is nevertheless disabled and a user would be able to e-sign the service without being forced to hit save. And apparently, even though a “saving…” dialog pops up upon e-signing, the form is not saved. I tried a bunch of things to try to get the save button to enable and the e-sign button to disable but it is difficult since the form DOM is not loaded at the time that the On Load script runs. In the end, I decided to just call the save form function directly.

So where the ellipses above are, I put
SaveForm2();

The end result here is that when the form is opened for editing, if the start date is before today’s date, myEvolv will update the start date to be today’s date and then save. The users will see the form start to open and then abruptly close if the conditions are met. When they reopen it, they will find that today’s date has been updated to today’s date and they are free to e-sign.

Full Code Block

var locked = getDataValue('event_log', 'event_log_id', keyValue, 'date_locked');
if(locked == '' && formXML.documentElement.getAttribute('formAction') == 'EDIT'){{
node = formXML.documentElement.selectNodes("form_group/form_item [@column_name = 'udf_rx_4_svc_start']");
node = node[0];
var start = new Date(node.text);
var today = new Date(todaysDate());
if(start < today){{
node.text = todaysDate();
node.setAttribute('modified', 'true');
SaveForm2();
}}
}}

Bonus: After Save Code

Since the form is going to be auto-saving itself, I also added a snippet of code to the After Save Code that keeps the form from closing after save:
window.closeAfterSave = false;

Troubleshooting: JavaScript – Not a Valid XSLT or XPath Function

If you have run into the “… is not a valid XSLT or XPath function” error, then chances are that you are messing with the Before Save or After Save properties on a form.

myEvolv uses XML to define forms and XSLT to transform the XML into HTML when displaying the form in the browser. When you export a form from myEvolv, you are downloading an XML document that defines the properties for all of the fields on the form and the form itself that you configured in the form designer. You can then upload that same file to another instance if myEvolv and the system will know how to create that form, generating all of the same fields and properties.

When you go to open a form to enter data, XSLT is used to take the XML ‘recipe’ for the form and convert it into HTML to display in the browser. This presents an issue when you try to store JavaScript code in the Before Save and After Save properties for a form because XSLT has some overlap with special characters in JavaScript and so unless you escape those in your JavaScript code, you XSLT will try to evaluate the code as an XSLT command rather than treat it as JavaScript code to pass along into the HTML.

When I got the error shown below, I was working on a snippet of JavaScript code for the Before Save property that would evaluate whether the start date of the service was before today’s date and if so, update the start date to be today’s date so that no service could be backdated. Part of my code included an if/then statement to check if start date was earlier than today’s date.

not-valid-xslt-function-error

Following JavaScript syntax, I wrote my conditional
if(start< today){setFormElement('udf_rx_4_svc_start', todaysDate())};
which caused the above error.

Turns out the problem was the curly brackets { and } because XSLT attempts to evaluate statements inside curly brackets and the XSLT did not contain a todaysDate() function. Luckily, there is a way to escape curly brackets in XML so that XSLT does not try to evaluate them and that is by using double curly brackets. So changing my code to
if(start< today){{setFormElement('udf_rx_4_svc_start', todaysDate())}};
did the trick. Error is gone and the form works as expected Before Save.

How To: Filter Activity Type and Encounter With Picklists

The activity_type_id and encounter_with_id columns in myEvolv’s Event Log table can come in handy when you are configuring events in myEvolv. If you don’t need to use these columns for their intended purpose, they are easily repurposed to hold other values and since they are event log fields, they can be pulled into the canned reports easily.

The picklist values for these two columns are configured in the Table Maintenance – Extended area of the Setup module.

activity-type-encounter-with-luts

You will notice that unlike the other lookup tables in myEvolv, these two have a Filter Code column.

filter-code-highlighted

Since these lookup tables are connected to Event Log fields that will be available to all events, the picklist could end up holding many more values than would apply to certain events or just more than you would want to display for a particular event. myEvolv provides the Filter Code column so that you can filter the picklist options on particular forms. The following is a guide for how to configure a filtered picklist.

Configure the Lookup Table

In my example, I am going to use the activity_type_id column to capture the method by which a clinician has contacted a family: Phone, Email, Text Message or In-Person

In the table maintenance for Services: Activity Types for Clients, I add an entry for each option and give all of the options a Filter Code of FN_ACT_TYPE

activity-type-lut-with-filter-code

Configure Form

Without filtering, I have the activity_type_id field on my form with the Activity Types for client services Look-up Table selected. When I go to open the picklist, I see the activity type look up table with all active options. The clinicians will need to search through the whole list to find one of the intended options.

unfiltered-picklist

In order to apply the filter, I first need to add a variable to the form. The variable should have a regular string Data Type. In my example, I have given the variable the name activity_type_filter and a caption of FN_ACT_TYPE. The variable also has a default value of ‘FN_ACT_TYPE’ (remember to include the single quotes when setting the default value). The default value must match the filter code that you used in the lookup table. I also toggled the Is Visible setting off so that it is not shown on the form.

variable-properties

Next I need to make the activity_type_id field on the form depend on the value of the variable.

In the Depends On (other) attribute, I add the following code:
getElementFromXML(formXML, 'activity_type_filter')
Note that the second argument is the name of the variable I created.

activity-type-properties

Now when I go to open the picklist, I will only see the options that have the filter code “FN_ACT_TYPE”.

filtered-picklist

Canned Reports

Because I used the activity_type_id, the values in this field will show up in many of the canned reports in myEvolv.

canned-report-activity-type

Data Entry Form (for New) vs Data Entry Form (for Edit)

myEvolv allows events to use a different form when entering a new event and editing an event. You can indicate which form to use for each in the Events Setup area of myEvolv. Typically you will use the same form for both but there are situations where you may want to consider using different forms. The following are some of the use cases that I have come up with for when you may want to use different forms for new vs. editing. If you have other use cases, please comment below and I will add them to my list.

When does myEvolv use each form?

The form indicated for Data Entry Form (for New) is used

  • when Entering a New Service or Manual Event

The form indicated for Data Entry Form (for Edit) is used

  • when Editing a service or event
  • when Amending a service or event
  • when Viewing a service or event after it has first been saved

Use Cases

1) Preventing Specific Fields from Being Modified on Edit and Amend

There may be some forms that can be edited or amended by clinicians that contain fields whose values should never change. You want to give event-level permission for clinicians to edit the form but prevent specific fields on form from ever being changed.

To accomplish this, you make a copy of the Data Entry Form (for New) and configure the desired columns to be not-modifiable on the Data Entry Form (for Edit).

2) Displaying System Generated Data on Forms After Save

There may be some fields or subreports that you only want to show on the form after the initial data entry has occurred because the fields or subreports may otherwise be empty or not rendering properly.

Example

You have services that require electronic signing or approval and while myEvolv puts a nice signature image with time stamp at the top of the event form, you want to display the approval timestamp on the form itself but you do not want the blank field showing on the form at the time the entry is being made.

Example

You have a subreport on a monthly summary form that is designed to pull in services provided in the same calendar month as the actual_date on the monthly summary form. When a clinician goes to enter a new monthly summary, there is no actual_date on the form so the subreport renders with all of the services ever entered for the individual, which confuses the clinicians. You want to display the subreport on the form only after a value had been saved to the actual_date field.

To accomplish this, you make a copy of the Data Entry Form (for Edit) and configure the desired columns to be not-visible on the Data Entry Form (for New).

3) Hiding the Actual Time on a Service

Many programs do not have a need to record the time that a service was provided so you may be tempted to display the actual_date field on the data entry forms as date only. However, when the time field of the actual_date is not shown on the form, the system inputs a time of “00:00 AM” when the event is saved to the database. If a second service of the same type is entered for a day, you will encounter a service overlap error and myEvolv will prevent you from saving the second service in the system. You need to collect a time when the service is first entered so that you can avoid the service overlap error but never want the time to be shown on the form again.

To accomplish this, you make a copy of the Data Entry Form (for New) and change the actual_date field’s display type to Date Only on the Data Entry Form (for Edit).

Tips & Tricks: Remove Unwanted Service Related Encounter Information from Services

I was recently working on configuring an event in myEvolv that required making a custom form in the People Placement and Treatment History form family.  Once I got the form looking right, I set about configuring the event.  I needed this event to be a service so that I could take advantage of the electronic signature functionality so I checked the “Is Service Event” checkbox for the event.

event-config


When I added a new service entry to test after saving this configuration, there was now Service Related Encounter Information appended to my form.

service-encounter-info


This was a problem since many of these fields were not applicable to the event that I was setting up and I did not want the clinicians to mess with them if they did not need them.  I looked back at the form designer to find out if I could hide them like other fields but they did not show up in the form designer.

form-designer-before


Fortunately, there is a way to get around this.  myEvolv automatically adds the Service Related Encounter Fields to your form if the event is a service.  myEvolv also does not allow a form to have the same field on it twice.  Therefore, if you add the fields to your form in form designer, you gain control of the form field properties and myEvolv will not append them to your form again.

As the automatically appended fields indicate, Program Providing Service and Facility Providing Service are required on service events in myEvolv so you do not want to hide these or make them not modifiable or not required. You can still move them around to make your form flow better. The other fields are able to be hidden.


Here is a list of the Service Related Encounter Information field column names so that you can add them to your form:

Form Label Event Log Field Column Name
Exempt from Billing do_not_bill
Activity Type activity_type_id
Client Involved is_client_involved
Program Providing Service program_providing_service
Facility Providing Service site_providing_service
Encounter With encounter_with_id
Service Authorization service_authorization_details_id


I added those that I wasn’t planning to display to their own Form Group and hid them.  I left the Program Providing Service and Facility Providing Service as they were in order to allow myEvolv to append those to my form automatically.

form-designer-after


When I saved the new form design and opened the event, the Service Related Encounter Fields I did not want to use were gone.

service-encounter-info-after

How To: Create a Custom Formset Member that Shows Only Active Diagnoses

My agency has a program that requires that clients have a script for service on file in order for services to be billable.  Since a script for service requires a diagnosis, we configured the program’s services to require an active diagnosis in order to generate a claim.  As a result, we have client diagnoses expiring on the same date as the script for service.  When a client gets a new script for service, the same diagnosis is re-entered with a new start and end date.  After a few years enrolled in this program, a client’s diagnosis screen begins to get cluttered with inactive diagnoses so our clinicians asked for a way to just see the current diagnoses that were on file rather than all of the diagnoses that had been entered for the client over the years.

myEvolv includes as “Diagnosis – Active” formset member that looks like it was created to serve exactly this function but it would not list any diagnoses that have end dates on them (even future end dates).   Our program’s diagnoses are entered with end dates since we need them to expire at the same time as the script for service.  We were able to get what we wanted by creating a custom formset that uses a custom default form with a modified list condition.  I have outlined the steps we took to accomplish this for our specific scenario but you could apply this in other situations where you want to customize the listing in a formset member.

Step 1: Create a New Default Form for Active Diagnoses

myEvolv’s Active Diagnosis formset member used the “Diagnosis form for listing – active only” form as its default form so we used it as the basis for our new form.

In the form designer, open the “Diagnosis Information” form family.

Right-click to copy the “Diagnosis form for listing – active only”.  Give the new form a name and code.  Ours is called “Active Dx for MyEvolv Launcher”


Step 2:  Modify the List Condition

In the new form’s header properties, edit the “List Condition Property”

list-condition-edit

Change the list condition code as shown below

list-condition-code

Explanation of Code and the List Condition Property

myEvolv’s code: event_log.end_date is null and event_log.is_deleted = 0

The List Condition property allows you to use SQL statements to manipulate the data that will be listed on the formset member.  Anything you put in the list condition property will be executed as though it is part of the “WHERE” clause on a SQL query.  In the code above, you can see that myEvolv’s list condition was designed to only list diagnoses that have no end_date and have not been deleted.

We adjusted the list condition to also show us diagnoses with end_dates in the future so I modified the code to:

(event_log.end_date IS NULL OR event_log.end_date > GETDATE()) AND event_log.is_deleted = 0

I used SQL’s GETDATE() function to get today’s date so now in order for the diagnosis to list, it must either have no end_date or an end_date that is greater than today’s date and not have been deleted.

Step 3:  Create a Custom Formset Member

We now need a place to apply the new form we created in myEvolv so that it can be used.  We could just swap put the form for the myEvolv-supplied active diagnosis formset member but since other programs might be using it, we decided to create a custom formset member that was only visible to the clinicians in this program.   Our clinicians use myEvolv Launcher as their home pages in myEvolv.  They are used to clicking on their clients from the My Client’s widget, which launches the My Client Information standalone formset so that is where we wanted to add our custom formset.

Go to Setup > User Tools > Formset Maintenance > FormSet Members and select the ‘My Client Information’  FormSet (it is in the “My Evolv” module)

Create a New “Formset Member – User Defined”.

list-condition-formset-member-setup

You can give the tab any caption or description you would like.  Because we are working with the Diagnoses, we have to pick “Diagnosis” for the Event Category that will allow us to pick the “Diagnosis Information” form family and our default form, “Active Dx for MyEvolv Launcher”.

NB: Once this is setup, remember to give users access to the new form in the Navigation Access Setup.  In this example, the new formset member is listed in the My Evolv Module -> My Client Information section.

Results

The screenshots below were taken on 7/11/2016 so active diagnoses would be those that have no end date or an and date after 7/11/2016.

diagnoses-all

This is the generic “Diagnosis Information” formset member.  It is showing all of the diagnoses (except those that have been deleted) for the client.  You can see that the first two would be active by our program’s definition since we have one with a future end date and one with no end date.  The other three are expired diagnoses and those are the ones that we do not wish to display in our custom formset member.


diagnosis-filtered-poorly

This is myEvolv’s “Diagnosis – Active” formset member.  It is only listing the active diagnosis that has no end date.


diagnoses-active

This is our “Script for Service – Active Only” formset member.  Both active diagnoses are listed.  Success!


List Condition Overwrite on Upgrade?

We have noticed that the list condition on this formset member has been overwritten after upgrading our system.  We have a support case about the phenomenon and hopefully it will be resolved in a future release but until then, beware and be sure to save a backup of your custom list condition code to re-apply after upgrades.

How To: Override a Field Value at Save

Besides the ‘On Load’, ‘On Click’, and ‘On Change’ events that myEvolv allows you to use as triggers for user defined scripts, each form itself has ‘Before Save Code’ and ‘After Save Code’ properties that also can be used to trigger scripts.  These can be useful if you want to apply some business logic to your forms in a way that is safe from modification by clinicians.  Take for example, this simple scenario:

You have a funder that wants no-show services submitted with a duration of 0 minutes.

Beyond simply instructing your clinicians to enter a ‘0’ for duration when the “No Show” checkbox is checked and crossing your fingers, you might approach the problem using the ‘On Click Script’ property for the is_noshow field.  You can write a simple script that checks if the checkbox is checked and if it is, it will put “0” in the duration field.  However, the clinicians are still able to go ahead and change that duration value to something else or even clear it out before they save the form, essentially overriding your business logic.  What would be better is for you to override their logic.  That is where the ‘Before Save Code’ and ‘After Save Code’ properties become useful.

before-save-after-save

‘Before Save Code’ fires after saving?!?

One thing that might be confusing when using these properties on your forms is understanding when the code that is associated with each property is executed.  The confusion stems from the conflation of clicking the ‘Save’ button on the form and actually executing its save algorithm.  The ‘Before Save Code’ fires after the Save button is clicked on the form but before myEvolv runs through its routines that takes the form data from your browser and enters it into the database.  ‘After Save Code’ fires after the save algorithm.  The ‘Before Save Code’ is the key to a solution to our scenario because we want to override some data on the form before myEvolv reads it into the database.

The code

if(document.getElementById('is_noshow').checked) setFormElement('duration', '00:00')

Some notes about the code

JavaScript usually likes the function body to be wrapped in curly brackets { and } but using them in ‘Before Save Code’ and ‘After Save Code’ properties throws an error related to XPath and XSLT. Leaving the brackets off does not.

Also, the second argument in the setFormElement call needs to be formatted precisely for myEvolv. When using the Duration(hh:mm) field on the form itself, if you enter a plain ‘0’, once you click out of the field, the form would resolve the value to ’00:00′. When using the ‘Before Save Code’ property, the form will not have the chance to perform that transformation so the value must be formatted properly in the code itself.

How the code works

The first part of the code is a simple if-statement to check if the is_noshow checkbox is checked. If it is, then a call is made to a Netsmart created setFormElement function that changes the duration field’s value to ’00:00′. The setFormElement function takes only two arguments: the name of the element and a value to set and can be used on any field on the form.

form-before-after

When the clinician opens the form, there will be no difference in the way that the form behaves and the clinician will be able to enter any duration he or she would like in the ‘Duration (hh:mm)’ field. Once the clinician hits the ‘Save’ button, the code will execute. If the clinician checked the “Session Not Provided” checkbox on the form (this is the label used on the is_noshow field in my example), then the value of ‘Duration (hh:mm)’ will be changed to ’00:00′ just before myEvolv runs its save routines. The clinician still will not see any difference until after the event is entered into the system. Re-opening the saved form will show that the ‘Duration (hh:mm)’ has been changed to ’00:00′ despite whatever duration had been entered by the clinician.

How To: Enable/Disable a Field Based on the Selected Value in a Picklist Field

Disable rules in myEvolv are one of the best methods we have available for controlling what data is collected during service entry.  There are a lot of forms in myEvolv that use checkboxes to enable and disable form fields but it is also possible to enable and disable form fields based on other criteria.

One of my programs needed some more logic built into how they were documenting the setting in which services were being provided.  They had been using a simple foreign key data field connected to a user defined lookup table to select a generic location.  They wanted to capture more specific locations in some cases without making drastic changes to the form.  My approach was to add two new fields to the form that would only be modifiable if certain options were selected in the generic location field.

Here is how the location section of the form looked after adding the new fields.

picklist-default-empty

The “Location of Service” field is the generic location field that was already on the form.  “Non-FRC Location” is a foreign key field that links to a new user-defined lookup table that contains the more specific locations when “Non-FRC Preschool/UPK”, “Non-FRC School” or “Daycare” is selected in “Location of Service”.  “Community Location” is a custom string field where the clinician can type a more specific location when “Community location” is selected in “Location of Service”.  Both of the new fields are required so that when they become enabled, the clinician cannot forget to add the information that the program wants.

The code

The community location piece is simpler so we will look at that first.  To get the “Community Location” field to enable only when “Community location” is selected in the “Location of Service” field, I used the following code in the “Community Location” fields disable rule property:

document.getElementById('serv_loca').value != '36A0BC74-E4FE-43AA-BF0F-BB429D6C28D1'

How the code works

The disable rule in myEvolv works like an if-statement where you get to determine the conditions.  Whatever you put into the disable rule property will be evaluated and if the result is true, the field will be disabled and if the result is false, the field will be enabled.  The statement above will evaluate true (disable the field) if the value of the ‘serv_loca’ field is not equal to ‘Community location’.

picklist-community-enabled

A note on the GUIDs

When you get the value of a foreign key field, the value is a foreign key and not the description or the code. That is why in the code, ‘Community location’ is actually ’36A0BC74-E4FE-43AA-BF0F-BB429D6C28D1′. You can check out my post on how to default a value on a picklist field for a method on how to find the foreign key value for items in your user defined lookup tables.

Adding complexity to the conditions

To get the “Non-FRC Location” field to enable only when one of three options is selected, the code needs to get a little more complex:

document.getElementById('serv_loca').value != '569B4372-5F51-492E-87EB-D1927EE714D4'
&amp;&amp; document.getElementById('serv_loca').value != 'E5AA86E2-C558-4423-9CE6-4D29B5489B76'
&amp;&amp; document.getElementById('serv_loca').value != '922BCDC4-DC91-4AC3-9949-3401AF509AE1'

How the more complex code works

Here, I am using the JavaScript logical operator && to say this statement should evaluate to true (that is, the field should be disabled) if the value of ‘serv_loca’ is not equal to ‘Day Care’ and not equal to ‘Non-FRC Preschool/UPK’ and not equal to ‘Non-FRC School’.  Based on how logical operators work, if a single one of those conditions is true, the entire statement evaluates as false and the field will be enabled.  You can also use the JavaScript “or” logical operator || to craft the conditional statement you need.

picklist-location-enabled

A note on ampersands

Another thing you might be wondering about is why I used &amp;&amp; instead of JavaScript’s “and” logical operator &&. I explain this in a troubleshooting post that you can read here.

Troubleshooting: XML – A name was started with an invalid character

I was working on designing a form for a program and when I went to launch the form to test the changes that I had made, I received an XML error:

There was an error in the form XML file:  CONTACT_ther_ser_nodx.xml.

Error reason: A name was started with an invalid character.

Error line/position in file: 824 / 108

Source text: disable_rule_code=”(document.getElementById(‘serv_loca’).value != ‘569B4372-5F51-492E-87EB-D1927EE714D4’ && document.getElementById(‘serv_loca’).value != ‘E5AA86E2-C558-4423-9CE6-4D29B5489B76’ && document.getElementById(‘serv_loca’).value != ‘922BCDC4-DC91=4AC3-9949-3401AF509AE1’)”


xml-error-invalid-character


According to the error message, myEvolv was taking issue with some JavaScript that I was attempting to use to disable/enable a field based on the selected value of a picklist field.  Apparently I had an invalid character.  After scanning through my code looking for an error in my JavaScript and not finding any, I took a closer look at the error and noticed that it was actually a problem in the form XML that was throwing the error but ti was somehow related to the JavaScript code I had written.

It turns out that the problem relates to the XML standard and special characters.  In JavaScript, a double ampersand, &&, is used for the logical operator “and”.  In XML, the ampersand is a special character and myEvolv stores form data in XML so when my disable rule JavaScript was being parsed within the XML form document without the ampersands escaped, it caused an invalid character XML error.

To fix this, I just had to switch the && in my JavaScript to &amp;&amp; and the form rendered fine and the JavaScript still worked.

*ARCHIVE* How To: Default a Date Field Value Based on Another Date Field

NOTE: THIS POST CONTAINS OBSOLETE CODE THAT WILL NOT WORK IN NX. I WILL KEEP THE POST AVAILABLE SINCE IT MAY PROVIDE SOME INSIGHT IN HOW TO USE JAVASCRIPT TO MANIPULATE MYEVOLV FORMS. YOU CAN FIND THE UPDATED VERSION OF THIS POST HERE.

When working on treatment plans in myEvolv, you will notice that many of the treatment plan component forms contain both a start date and a target completion date.  One of the programs I was building a treatment plan for wanted to have the target completion date on the form but always wanted it to be 90 days from the start date.  Instead of making each clinician calculate 90 days from the start date and fill it in themselves, I used this method to take the date value from the start date and update the target completion date field with a value that is 90 days later.  I will walk you through the JavaScript that I used so that you can make adjustments based on your needs.  The full snippet of JavaScript will be at the end.

two-fields

Where does the code go?

The first consideration is where to put the JavaScript.  In this case, used the ‘On Change Script’ field property on the field that will be modified by the clinician, ‘start_date’.  myEvolv provides us with access to 3 events that we can use to trigger our JavaScript handlers (the code we want to execute):  ‘On Change’, ‘On Click’ and ‘On Load’.  The ‘On Change’ event is fired when the value of the field has been changed.  This is the most suitable event to use in this situation since I do not want the new date value to calculate until there is a value in the first date field.  Furthermore, if a clinician makes a mistake entering the start date, I want the new date to recalculate when the clinician makes an adjustment.  Both of these scenarios are covered when using the ‘On Change’ event.

Get the ‘start_date’

The first line of JavaScript code’s purpose is to get the value that has been placed into the ‘start_date’ field and convert it into a proper JavaScript Date object so that we can manipulate the date easily. I decalred a variable named date and set it to be a new Date object passing the value of the ‘start_date’ field as its argument:

var date = new Date(document.getElementById('start_date').value);

Calculate a New Date

Now with the date entered by the clinician converted to a Date object, I can perform some calculations on the date using the ‘getter’ and ‘setter’ methods built in to JavaScript Date objects. In my scenario, I need the ‘target_date’ field to be +90 days from the ‘start_date’ so I used the getDate() and setDate() methods:

date.setDate(date.getDate() + 90);

If I wanted to do +3 months instead, I would use the getMonth() and setMonth() methods:

date.setMonth(date.getMonth() + 3);

If I wanted to do +1 year, I would use the getFullYear() and setFullYear() methods:

date.setFullYear(date.getFullYear() + 1);

There are also methods for getting and setting hours, minutes, seconds, and milliseconds, but I am dealing with Date Only fields in this scenario.

Format the New Date

Now that the date object has my new date stored in it, I need to put that value into the ‘target_date’ field. However, the date in the date object is not formatted in a way that myEvolv’s date fields like so I need to pull the individual date elements from the object and build a string value to place in the date field. I accomplish this first by declaring variables for the month, day and year:

var mm = date.getMonth() + 1;//+1 is needed because in JavaScript Date objects, January is 0
var dd = date.getDate();
var yyyy = date.getFullYear();

Now I declare a new variable called formatted_date and set its value to a concatenated myEvolv-friendly string:

var formatted_date = mm + '/' + dd + '/' + yyyy;

Set the ‘target_date’

Next I can put this string into the field on the form. Since I will do a few things to the ‘target_date’ field, I am going to create a variable called target_date to refer to it more quickly:

var target_date = document.getElementById('target_date');
target_date.value = formatted_date;

Awaken the ‘target_date’ Field

You might think that you are done here because the new date has been loaded into the form, however, because I used JavaScript to update the value of ‘target_date’, the form itself does not recognize that a change has been made to ‘target_date’ which is indicated by the form label and field value text turning red. Even though the value is in the form field, upon saving, the form will not recognize the field as having a new value and will not include it in its save operation. One way to fix that is to manually click in the ‘target_date’ field and then click out of it so that the form recognizes a change in the value of the field but that is un-intuitive and error-prone. Luckily, JavaScript provides a method for simulating this with the focus() and blur() methods to use on form fields:

target_date.focus();
target_date.blur();

With these two lines at the end, after the new date value has been filled in on the ‘target_date’ field, the field label turns red which means that the form has recognized that its value has changed and it will include the change when the form is saved.

two-fields-filled

One Caveat

You may be inclined to disable the ‘target_date’ form field so that clinicians cannot change the value after it has been calculated. I was unable to get that to work, however. When a form field is disabled, it is excluded from being saved so for now it would seem that you have to keep the form field modifiable. If you used this same similar* code in the ‘On Change Script’ property for ‘target_date’, you could prevent the ‘target_date’ from being changed by effectively reverting any attempts at changing the ‘target_date’ manually.

*You will need to also add some JavaScript to validate that the ‘target_date’ has been changed because if you just put this exact same code in the ‘On Change Script’ property for ‘target_date’, you will end up in an infinite loop when ‘actual_date’ is changed on the form and you will crash the browser.

The Full Code

var date = new Date(document.getElementById('start_date').value);
date.setDate(date.getDate() + 90);
var mm = date.getMonth() + 1;
var dd = date.getDate();
var yyyy = date.getFullYear();
var formatted_date = mm + '/' + dd + '/' +yyyy;
var target_date = document.getElementById('target_date');
target_date.value = formatted_date;
target_date.focus();
target_date.blur();

We are using cookies on our website

Please confirm, if you accept our tracking cookies. You can also decline the tracking, so you can continue to visit our website without any data sent to third party services.