
How To: Filter Activity Type and Encounter With Picklists

The activity_type_id and encounter_with_id columns in myEvolv’s Event Log table can come in handy when you are configuring events in myEvolv. If you don’t need to use these columns for their intended purpose, they are easily repurposed to hold other values and since they are event log fields, they can be pulled into the canned reports easily.

The picklist values for these two columns are configured in the Table Maintenance – Extended area of the Setup module.

activity-type-encounter-with-luts

You will notice that unlike the other lookup tables in myEvolv, these two have a Filter Code column.

filter-code-highlighted

Since these lookup tables are connected to Event Log fields that will be available to all events, the picklist could end up holding many more values than would apply to certain events or just more than you would want to display for a particular event. myEvolv provides the Filter Code column so that you can filter the picklist options on particular forms. The following is a guide for how to configure a filtered picklist.

Configure the Lookup Table

In my example, I am going to use the activity_type_id column to capture the method by which a clinician has contacted a family: Phone, Email, Text Message or In-Person

In the table maintenance for Services: Activity Types for Clients, I add an entry for each option and give all of the options a Filter Code of FN_ACT_TYPE

activity-type-lut-with-filter-code

Configure Form

Without filtering, I have the activity_type_id field on my form with the Activity Types for client services Look-up Table selected. When I go to open the picklist, I see the activity type look up table with all active options. The clinicians will need to search through the whole list to find one of the intended options.

unfiltered-picklist

In order to apply the filter, I first need to add a variable to the form. The variable should have a regular string Data Type. In my example, I have given the variable the name activity_type_filter and a caption of FN_ACT_TYPE. The variable also has a default value of ‘FN_ACT_TYPE’ (remember to include the single quotes when setting the default value). The default value must match the filter code that you used in the lookup table. I also toggled the Is Visible setting off so that it is not shown on the form.

variable-properties

Next I need to make the activity_type_id field on the form depend on the value of the variable.

In the Depends On (other) attribute, I add the following code:
getElementFromXML(formXML, 'activity_type_filter')
Note that the second argument is the name of the variable I created.

activity-type-properties

Now when I go to open the picklist, I will only see the options that have the filter code “FN_ACT_TYPE”.

filtered-picklist

Canned Reports

Because I used the activity_type_id, the values in this field will show up in many of the canned reports in myEvolv.

canned-report-activity-type

Data Entry Form (for New) vs Data Entry Form (for Edit)

myEvolv allows events to use a different form when entering a new event and editing an event. You can indicate which form to use for each in the Events Setup area of myEvolv. Typically you will use the same form for both but there are situations where you may want to consider using different forms. The following are some of the use cases that I have come up with for when you may want to use different forms for new vs. editing. If you have other use cases, please comment below and I will add them to my list.

When does myEvolv use each form?

The form indicated for Data Entry Form (for New) is used

  • when Entering a New Service or Manual Event

The form indicated for Data Entry Form (for Edit) is used

  • when Editing a service or event
  • when Amending a service or event
  • when Viewing a service or event after it has first been saved

Use Cases

1) Preventing Specific Fields from Being Modified on Edit and Amend

There may be some forms that can be edited or amended by clinicians that contain fields whose values should never change. You want to give event-level permission for clinicians to edit the form but prevent specific fields on form from ever being changed.

To accomplish this, you make a copy of the Data Entry Form (for New) and configure the desired columns to be not-modifiable on the Data Entry Form (for Edit).

2) Displaying System Generated Data on Forms After Save

There may be some fields or subreports that you only want to show on the form after the initial data entry has occurred because the fields or subreports may otherwise be empty or not rendering properly.

Example

You have services that require electronic signing or approval and while myEvolv puts a nice signature image with time stamp at the top of the event form, you want to display the approval timestamp on the form itself but you do not want the blank field showing on the form at the time the entry is being made.

Example

You have a subreport on a monthly summary form that is designed to pull in services provided in the same calendar month as the actual_date on the monthly summary form. When a clinician goes to enter a new monthly summary, there is no actual_date on the form so the subreport renders with all of the services ever entered for the individual, which confuses the clinicians. You want to display the subreport on the form only after a value had been saved to the actual_date field.

To accomplish this, you make a copy of the Data Entry Form (for Edit) and configure the desired columns to be not-visible on the Data Entry Form (for New).

3) Hiding the Actual Time on a Service

Many programs do not have a need to record the time that a service was provided so you may be tempted to display the actual_date field on the data entry forms as date only. However, when the time field of the actual_date is not shown on the form, the system inputs a time of “00:00 AM” when the event is saved to the database. If a second service of the same type is entered for a day, you will encounter a service overlap error and myEvolv will prevent you from saving the second service in the system. You need to collect a time when the service is first entered so that you can avoid the service overlap error but never want the time to be shown on the form again.

To accomplish this, you make a copy of the Data Entry Form (for New) and change the actual_date field’s display type to Date Only on the Data Entry Form (for Edit).

myEvolv EventLog Date and Time Fields MEGAPOST

Last Updated:  August 23rd, 2016

When you are configuring forms in myEvolv, it can be tricky determining how to handle dates and times. Different myEvolv date and time fields are used within the system in different ways. Some of the implications of using one EventLog date or time field over another might not be apparent until the form has been in use for a while, at which point it might be too late.

This post will be an attempt to layout everything I figure out about the way the various EventLog date and time fields work in myEvolv to aid in making a more informed choice about which to include on forms.

Date and Time Columns Available in the EventLog

As of v9.0.6994.136, the EventLog table contains the following date and time columns:
You can click a column caption to skip down to the details for that column

Caption Column DataType
Actual Date actual_date DateTime
Amended Date amended_dt_tm DateTime
Approval Date Internal QI/MIS approved_qi_date Date Only
Approval External Date approved_external_date Date Only
Approved Date approved_date Date Only
Date Entered date_entered DateTime Updated
Date Locked date_locked DateTime
Date timestamp timesheet was submitted date_submitted DateTime
End date end_date DateTime
Expiration Date expiration_date Date Only
Final Approval Date final_approval_date Date Only
Proc Discontinued Date proc_discontinued_date DateTime
Procedure Completion Date proc_completed_date DateTime
Reconciliation Date reconciliation_date DateTime
Target End Date target_end_date Date Only
Verified Date verified_date DateTime
Duration duration Time Duration
Duration Other duration_other Time Duration
Planning Time planning_time Time Duration
Travel Time travel_time Time Duration

DataTypes and Display Code Type

Date and Time data can be displayed and captured in a few different ways on forms depending on the Display Type Code that is indicated in the form field’s properties

DateTime Displays a date field and a time field datetime-display
Date Only Displays a date field with no time field date-only-display
Time Displays a time field with no date field time-display
Time Duration Displays a time duration field time-duration-display

Default Display Code Type

date-field-properties

In the form designer, the default Display Code Type is based on the DataType of the column:

  • If you select a DateTime column, the Display Type Code will default to DateTime
  • If you select a Date Only column, the Display Type Code will default to Date Only
  • If you select a DateTime Updated column, the Display Type Code will default to DateTime
  • If you select a Time Duration field, the Display Type Code will default to Time Duration
  • If you select a Time Only field, the Display Type Code will default to Time (there are currently no Time Only columns in the EventLog table but you may wish to create a user-defined field column of this type so it is included here)

Changing Display Code Type

In some cases, you can change the display type for the field.

  • You CAN use a Date Only Display Code Type on DateTime and DateTime Updated columns
    • This will allow you to display or capture dates without a time when you want to use one of the DateTime columns.
    • When a DateTime column is captured using Date Only Display Code Type, the time will be inserted into the database as 00:00 AM
      • This has implications for service overlaps – multiple services with no captured specific time for a client in a single day will have the same time


  • You CAN* use a Time Display Code Type on DateTime and DateTime Updated columns
    • *myEvolv will not prevent you from saving a form with a field setup this way, however it is not terribly useful (see below)
    • This will allow you to capture times without a date, however it will display a date/time string.
      • datetime-disp-time-after-save
    • When a DateTime column is captured using Time Display Code Type, the date will be inserted into the database as 1/1/1900


  • You CANNOT use a DateTime Display Type Code on a Date Only column
    • Date Only columns do not have a corresponding _tzo column in the database to store the time value that you are capturing on the form. Upon attempting to save, you will receive an error that will prevent the save.


  • It is UNKNOWN whether you can use a DateTime Display Type Code on a Time Only column
    • I will investigate this soon.


  • You CAN use a Time Display Type Code on a Time Duration column
    • This will allow you to capture a time without needing a date value.
    • This may have unforseen consequences elsewhere in myEvolv since the system expects this data to represent a duration, not a timestamp — requires more investigation

Individual Column Details

Actual Date | actual_date

The actual_date is an important date field in the EventLog when it comes to events. It is meant to represent the actual date and time that an event occurred.

Where else is it used?

It is the date and time that displays in the Service Entry listing in the “Actual Date-Time” column
service-entry-actual-date

The actual date also displays in the Treatment Plans listing in the “Start Date” column
plan-development-actual-date

The actual_date appears in the “Actual Date” column in the Service/Case notes & Planning Approval area of myEvolv. It is displayed as Date Only
actual-date-supervisor-module

Service Overlaps

myEvolv does not allow service events of the same type to overlap for a client. Therefore if you are setting up an event that could occur multiple times in a single day, you must display the actual_date as a DateTime field on the form and have clinicians input a time. If you display the actual_date as Date Only, all services will be put into the database at 00:00 AM and myEvolv is prevent the second service of the same type from saving because of an overlap. If you do not wish to have the time displayed on the events after the initial entry, you could use a different “Edit Form” in the event configuration which displays the actual_date as Date Only.

service-overlap-error


Amended Date | amended_dt_tm


Approved Date Internal QI/MIS | approved_qi_date


Approval External Date | approved_external_date


Approved Date | approved_date

The approved_date appears in the “Approved Date” column in the Service/Case notes & Planning Approval area of myEvolv. It is displayed as Date Only
approved-date-supervisor-module


Date Entered | date_entered

The date_entered column is used by myEvolv to store a timestamp for when an event is first saved in the system.

This column is displayed on the Clients Services & Treatment canned reports, which show both the actual_date that clinician’s enter on their services and the entered_date that the system generates so that supervisors can check for contemporaneity of entries.

The difference between the entered_date and the actual_date is used to determine if a service has been documented contemporaneously based on the contemporaneous rule defined in the billing setups and when running a Contemporaneous Rule Report canned report.

Since this column is intended to store system-generated timestamps, it is not recommended that you add this field to a form except in the case that you would like to display the date and time that an entry was entered into the system by a clinician. In this case, the field should be made not-modifiable.

Where else is it used?

The date_entered appears in the “Entry Information” column in the Service/Case notes & Planning Approval area of myEvolv.
date-entered-supervisor-module


Date Locked | date_locked

The date_locked column is used by myEvolv to store a timestamp for when a service is last e-signed by the entering clinician this locking the event from being edited.

The system generates the timestamp when a service event is electronically signed which can occur in three circumstances:

  1. Upon saving a service if the service is configured to “Auto-Submit/Sign”. In this case, the date_locked column will have the same timestamp as the date_entered column.
  2. Upon clicking the “Electronically Sign” button if the service is configured for “Electronically Signed”
  3. Upon clicking the “Submit” button if the service is configured for “Can Submit”

If a clinician clicks the “Remove Electronic Signature” button on an electronically signed service, the date_locked column will become NULL.

Since this column is intended to store system-generated timestamps, it is not recommended that you add this field to a form. The date_locked will display on electronically-signed services automatically (see below).

Where else is it used?

The date_locked displays as the “Date” with the signature image on electronically signed
locked-date-sig-image

and submitted services for the “Signed by” signatures
locked-date-sig-image-approved

[the “Date” for the “Approved by” signatures come from the approved_date column]

The date_locked appears in the “Submission Date” column in the Service/Case notes & Planning Approval area of myEvolv. It is displayed as Date Only
locked-date-supervisor-module


Date timestamp timesheet was submitted | date_submitted


End date | end_date


Expiration Date | expiration_date

The expiration_date column is intended to be used to indicate the expiration date of a treatment plan in myEvolv.

Where else is it used?

The expiration_date appears in the “Expiration Date” column in the Plan Development area of myEvolv.
expiration-date-plan-development


Final Approval Date | final_approval_date

The final_approval_date column is used by myEvolv to store a timestamp for when the final step of a route has been completed.

Since this column is intended to store system-generated timestamps, it is not recommended that you add this field to a form. The final_approval_date will display in the Routing History of routed treatment plans.

Where else is it used?

The final_approval_date appears in the “Final Approval Date” column in the Plan Development area of myEvolv.
final-approval-date-treatment-plans


Proc Discontinued Date | proc_discontinued_date


Procedure Completion Date | proc_completed_date


Reconciliation Date | reconciliation_date


Target End Date | target_end_date


Verified Date | verified_date


Duration | duration


Duration Other | duration_other


Planning Time | planning_time


Travel Time | travel_time


Tips & Tricks: Remove Unwanted Service Related Encounter Information from Services

I was recently working on configuring an event in myEvolv that required making a custom form in the People Placement and Treatment History form family.  Once I got the form looking right, I set about configuring the event.  I needed this event to be a service so that I could take advantage of the electronic signature functionality so I checked the “Is Service Event” checkbox for the event.

event-config


When I added a new service entry to test after saving this configuration, there was now Service Related Encounter Information appended to my form.

service-encounter-info


This was a problem since many of these fields were not applicable to the event that I was setting up and I did not want the clinicians to mess with them if they did not need them.  I looked back at the form designer to find out if I could hide them like other fields but they did not show up in the form designer.

form-designer-before


Fortunately, there is a way to get around this.  myEvolv automatically adds the Service Related Encounter Fields to your form if the event is a service.  myEvolv also does not allow a form to have the same field on it twice.  Therefore, if you add the fields to your form in form designer, you gain control of the form field properties and myEvolv will not append them to your form again.

As the automatically appended fields indicate, Program Providing Service and Facility Providing Service are required on service events in myEvolv so you do not want to hide these or make them not modifiable or not required. You can still move them around to make your form flow better. The other fields are able to be hidden.


Here is a list of the Service Related Encounter Information field column names so that you can add them to your form:

Form Label Event Log Field Column Name
Exempt from Billing do_not_bill
Activity Type activity_type_id
Client Involved is_client_involved
Program Providing Service program_providing_service
Facility Providing Service site_providing_service
Encounter With encounter_with_id
Service Authorization service_authorization_details_id


I added those that I wasn’t planning to display to their own Form Group and hid them.  I left the Program Providing Service and Facility Providing Service as they were in order to allow myEvolv to append those to my form automatically.

form-designer-after


When I saved the new form design and opened the event, the Service Related Encounter Fields I did not want to use were gone.

service-encounter-info-after

How To: Override a Field Value at Save

Besides the ‘On Load’, ‘On Click’, and ‘On Change’ events that myEvolv allows you to use as triggers for user defined scripts, each form itself has ‘Before Save Code’ and ‘After Save Code’ properties that also can be used to trigger scripts.  These can be useful if you want to apply some business logic to your forms in a way that is safe from modification by clinicians.  Take for example, this simple scenario:

You have a funder that wants no-show services submitted with a duration of 0 minutes.

Beyond simply instructing your clinicians to enter a ‘0’ for duration when the “No Show” checkbox is checked and crossing your fingers, you might approach the problem using the ‘On Click Script’ property for the is_noshow field.  You can write a simple script that checks if the checkbox is checked and if it is, it will put “0” in the duration field.  However, the clinicians are still able to go ahead and change that duration value to something else or even clear it out before they save the form, essentially overriding your business logic.  What would be better is for you to override their logic.  That is where the ‘Before Save Code’ and ‘After Save Code’ properties become useful.

before-save-after-save

‘Before Save Code’ fires after saving?!?

One thing that might be confusing when using these properties on your forms is understanding when the code that is associated with each property is executed.  The confusion stems from the conflation of clicking the ‘Save’ button on the form and actually executing its save algorithm.  The ‘Before Save Code’ fires after the Save button is clicked on the form but before myEvolv runs through its routines that takes the form data from your browser and enters it into the database.  ‘After Save Code’ fires after the save algorithm.  The ‘Before Save Code’ is the key to a solution to our scenario because we want to override some data on the form before myEvolv reads it into the database.

The code

if(document.getElementById('is_noshow').checked) setFormElement('duration', '00:00')

Some notes about the code

JavaScript usually likes the function body to be wrapped in curly brackets { and } but using them in ‘Before Save Code’ and ‘After Save Code’ properties throws an error related to XPath and XSLT. Leaving the brackets off does not.

Also, the second argument in the setFormElement call needs to be formatted precisely for myEvolv. When using the Duration(hh:mm) field on the form itself, if you enter a plain ‘0’, once you click out of the field, the form would resolve the value to ’00:00′. When using the ‘Before Save Code’ property, the form will not have the chance to perform that transformation so the value must be formatted properly in the code itself.

How the code works

The first part of the code is a simple if-statement to check if the is_noshow checkbox is checked. If it is, then a call is made to a Netsmart created setFormElement function that changes the duration field’s value to ’00:00′. The setFormElement function takes only two arguments: the name of the element and a value to set and can be used on any field on the form.

form-before-after

When the clinician opens the form, there will be no difference in the way that the form behaves and the clinician will be able to enter any duration he or she would like in the ‘Duration (hh:mm)’ field. Once the clinician hits the ‘Save’ button, the code will execute. If the clinician checked the “Session Not Provided” checkbox on the form (this is the label used on the is_noshow field in my example), then the value of ‘Duration (hh:mm)’ will be changed to ’00:00′ just before myEvolv runs its save routines. The clinician still will not see any difference until after the event is entered into the system. Re-opening the saved form will show that the ‘Duration (hh:mm)’ has been changed to ’00:00′ despite whatever duration had been entered by the clinician.

How To: Enable/Disable a Field Based on the Selected Value in a Picklist Field

Disable rules in myEvolv are one of the best methods we have available for controlling what data is collected during service entry.  There are a lot of forms in myEvolv that use checkboxes to enable and disable form fields but it is also possible to enable and disable form fields based on other criteria.

One of my programs needed some more logic built into how they were documenting the setting in which services were being provided.  They had been using a simple foreign key data field connected to a user defined lookup table to select a generic location.  They wanted to capture more specific locations in some cases without making drastic changes to the form.  My approach was to add two new fields to the form that would only be modifiable if certain options were selected in the generic location field.

Here is how the location section of the form looked after adding the new fields.

picklist-default-empty

The “Location of Service” field is the generic location field that was already on the form.  “Non-FRC Location” is a foreign key field that links to a new user-defined lookup table that contains the more specific locations when “Non-FRC Preschool/UPK”, “Non-FRC School” or “Daycare” is selected in “Location of Service”.  “Community Location” is a custom string field where the clinician can type a more specific location when “Community location” is selected in “Location of Service”.  Both of the new fields are required so that when they become enabled, the clinician cannot forget to add the information that the program wants.

The code

The community location piece is simpler so we will look at that first.  To get the “Community Location” field to enable only when “Community location” is selected in the “Location of Service” field, I used the following code in the “Community Location” fields disable rule property:

document.getElementById('serv_loca').value != '36A0BC74-E4FE-43AA-BF0F-BB429D6C28D1'

How the code works

The disable rule in myEvolv works like an if-statement where you get to determine the conditions.  Whatever you put into the disable rule property will be evaluated and if the result is true, the field will be disabled and if the result is false, the field will be enabled.  The statement above will evaluate true (disable the field) if the value of the ‘serv_loca’ field is not equal to ‘Community location’.

picklist-community-enabled

A note on the GUIDs

When you get the value of a foreign key field, the value is a foreign key and not the description or the code. That is why in the code, ‘Community location’ is actually ’36A0BC74-E4FE-43AA-BF0F-BB429D6C28D1′. You can check out my post on how to default a value on a picklist field for a method on how to find the foreign key value for items in your user defined lookup tables.

Adding complexity to the conditions

To get the “Non-FRC Location” field to enable only when one of three options is selected, the code needs to get a little more complex:

document.getElementById('serv_loca').value != '569B4372-5F51-492E-87EB-D1927EE714D4'
&& document.getElementById('serv_loca').value != 'E5AA86E2-C558-4423-9CE6-4D29B5489B76'
&& document.getElementById('serv_loca').value != '922BCDC4-DC91-4AC3-9949-3401AF509AE1'

How the more complex code works

Here, I am using the JavaScript logical operator && to say this statement should evaluate to true (that is, the field should be disabled) if the value of ‘serv_loca’ is not equal to ‘Day Care’ and not equal to ‘Non-FRC Preschool/UPK’ and not equal to ‘Non-FRC School’.  Based on how logical operators work, if a single one of those conditions is true, the entire statement evaluates as false and the field will be enabled.  You can also use the JavaScript “or” logical operator || to craft the conditional statement you need.

picklist-location-enabled

A note on ampersands

Another thing you might be wondering about is why I used && instead of JavaScript’s “and” logical operator &&. I explain this in a troubleshooting post that you can read here.

Troubleshooting: XML – A name was started with an invalid character

I was working on designing a form for a program and when I went to launch the form to test the changes that I had made, I received an XML error:

There was an error in the form XML file:  CONTACT_ther_ser_nodx.xml.

Error reason: A name was started with an invalid character.

Error line/position in file: 824 / 108

Source text: disable_rule_code=”(document.getElementById(‘serv_loca’).value != ‘569B4372-5F51-492E-87EB-D1927EE714D4’ && document.getElementById(‘serv_loca’).value != ‘E5AA86E2-C558-4423-9CE6-4D29B5489B76’ && document.getElementById(‘serv_loca’).value != ‘922BCDC4-DC91=4AC3-9949-3401AF509AE1’)”


xml-error-invalid-character


According to the error message, myEvolv was taking issue with some JavaScript that I was attempting to use to disable/enable a field based on the selected value of a picklist field.  Apparently I had an invalid character.  After scanning through my code looking for an error in my JavaScript and not finding any, I took a closer look at the error and noticed that it was actually a problem in the form XML that was throwing the error but ti was somehow related to the JavaScript code I had written.

It turns out that the problem relates to the XML standard and special characters.  In JavaScript, a double ampersand, &&, is used for the logical operator “and”.  In XML, the ampersand is a special character and myEvolv stores form data in XML so when my disable rule JavaScript was being parsed within the XML form document without the ampersands escaped, it caused an invalid character XML error.

To fix this, I just had to switch the && in my JavaScript to && and the form rendered fine and the JavaScript still worked.

*ARCHIVE* How To: Default a Date Field Value Based on Another Date Field

NOTE: THIS POST CONTAINS OBSOLETE CODE THAT WILL NOT WORK IN NX. I WILL KEEP THE POST AVAILABLE SINCE IT MAY PROVIDE SOME INSIGHT IN HOW TO USE JAVASCRIPT TO MANIPULATE MYEVOLV FORMS. YOU CAN FIND THE UPDATED VERSION OF THIS POST HERE.

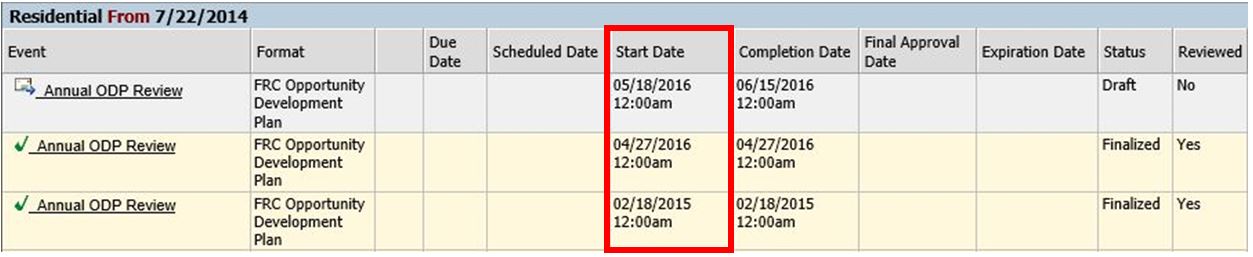
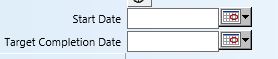
When working on treatment plans in myEvolv, you will notice that many of the treatment plan component forms contain both a start date and a target completion date.  One of the programs I was building a treatment plan for wanted to have the target completion date on the form but always wanted it to be 90 days from the start date.  Instead of making each clinician calculate 90 days from the start date and fill it in themselves, I used this method to take the date value from the start date and update the target completion date field with a value that is 90 days later.  I will walk you through the JavaScript that I used so that you can make adjustments based on your needs.  The full snippet of JavaScript will be at the end.

two-fields

Where does the code go?

The first consideration is where to put the JavaScript.  In this case, used the ‘On Change Script’ field property on the field that will be modified by the clinician, ‘start_date’.  myEvolv provides us with access to 3 events that we can use to trigger our JavaScript handlers (the code we want to execute):  ‘On Change’, ‘On Click’ and ‘On Load’.  The ‘On Change’ event is fired when the value of the field has been changed.  This is the most suitable event to use in this situation since I do not want the new date value to calculate until there is a value in the first date field.  Furthermore, if a clinician makes a mistake entering the start date, I want the new date to recalculate when the clinician makes an adjustment.  Both of these scenarios are covered when using the ‘On Change’ event.

Get the ‘start_date’

The first line of JavaScript code’s purpose is to get the value that has been placed into the ‘start_date’ field and convert it into a proper JavaScript Date object so that we can manipulate the date easily. I decalred a variable named date and set it to be a new Date object passing the value of the ‘start_date’ field as its argument:

var date = new Date(document.getElementById('start_date').value);

Calculate a New Date

Now with the date entered by the clinician converted to a Date object, I can perform some calculations on the date using the ‘getter’ and ‘setter’ methods built in to JavaScript Date objects. In my scenario, I need the ‘target_date’ field to be +90 days from the ‘start_date’ so I used the getDate() and setDate() methods:

date.setDate(date.getDate() + 90);

If I wanted to do +3 months instead, I would use the getMonth() and setMonth() methods:

date.setMonth(date.getMonth() + 3);

If I wanted to do +1 year, I would use the getFullYear() and setFullYear() methods:

date.setFullYear(date.getFullYear() + 1);

There are also methods for getting and setting hours, minutes, seconds, and milliseconds, but I am dealing with Date Only fields in this scenario.

Format the New Date

Now that the date object has my new date stored in it, I need to put that value into the ‘target_date’ field. However, the date in the date object is not formatted in a way that myEvolv’s date fields like so I need to pull the individual date elements from the object and build a string value to place in the date field. I accomplish this first by declaring variables for the month, day and year:

var mm = date.getMonth() + 1;//+1 is needed because in JavaScript Date objects, January is 0
var dd = date.getDate();
var yyyy = date.getFullYear();

Now I declare a new variable called formatted_date and set its value to a concatenated myEvolv-friendly string:

var formatted_date = mm + '/' + dd + '/' + yyyy;

Set the ‘target_date’

Next I can put this string into the field on the form. Since I will do a few things to the ‘target_date’ field, I am going to create a variable called target_date to refer to it more quickly:

var target_date = document.getElementById('target_date');
target_date.value = formatted_date;

Awaken the ‘target_date’ Field

You might think that you are done here because the new date has been loaded into the form, however, because I used JavaScript to update the value of ‘target_date’, the form itself does not recognize that a change has been made to ‘target_date’ which is indicated by the form label and field value text turning red. Even though the value is in the form field, upon saving, the form will not recognize the field as having a new value and will not include it in its save operation. One way to fix that is to manually click in the ‘target_date’ field and then click out of it so that the form recognizes a change in the value of the field but that is un-intuitive and error-prone. Luckily, JavaScript provides a method for simulating this with the focus() and blur() methods to use on form fields:

target_date.focus();
target_date.blur();

With these two lines at the end, after the new date value has been filled in on the ‘target_date’ field, the field label turns red which means that the form has recognized that its value has changed and it will include the change when the form is saved.

two-fields-filled

One Caveat

You may be inclined to disable the ‘target_date’ form field so that clinicians cannot change the value after it has been calculated. I was unable to get that to work, however. When a form field is disabled, it is excluded from being saved so for now it would seem that you have to keep the form field modifiable. If you used this same similar* code in the ‘On Change Script’ property for ‘target_date’, you could prevent the ‘target_date’ from being changed by effectively reverting any attempts at changing the ‘target_date’ manually.

*You will need to also add some JavaScript to validate that the ‘target_date’ has been changed because if you just put this exact same code in the ‘On Change Script’ property for ‘target_date’, you will end up in an infinite loop when ‘actual_date’ is changed on the form and you will crash the browser.

The Full Code

var date = new Date(document.getElementById('start_date').value);
date.setDate(date.getDate() + 90);
var mm = date.getMonth() + 1;
var dd = date.getDate();
var yyyy = date.getFullYear();
var formatted_date = mm + '/' + dd + '/' +yyyy;
var target_date = document.getElementById('target_date');
target_date.value = formatted_date;
target_date.focus();
target_date.blur();

We are using cookies on our website

Please confirm, if you accept our tracking cookies. You can also decline the tracking, so you can continue to visit our website without any data sent to third party services.