How To: Default Value for Picklist Field

You may find that a myEvolv form that you wish to use contains a picklist field that cannot be done away with, even though the user is always going to be selecting the same item.  For instance, you may have a treatment plan for a program where there is only one category of goals, but you have to select that category on each and every component anyway.  Just like other fields in myEvolv, you have the option of setting a default value for a picklist field, but it is a little trickier to setup than it is for text and date fields.  Defaulting values for picklist fields where there are no real options will save your users time when completing their work in myEvolv.

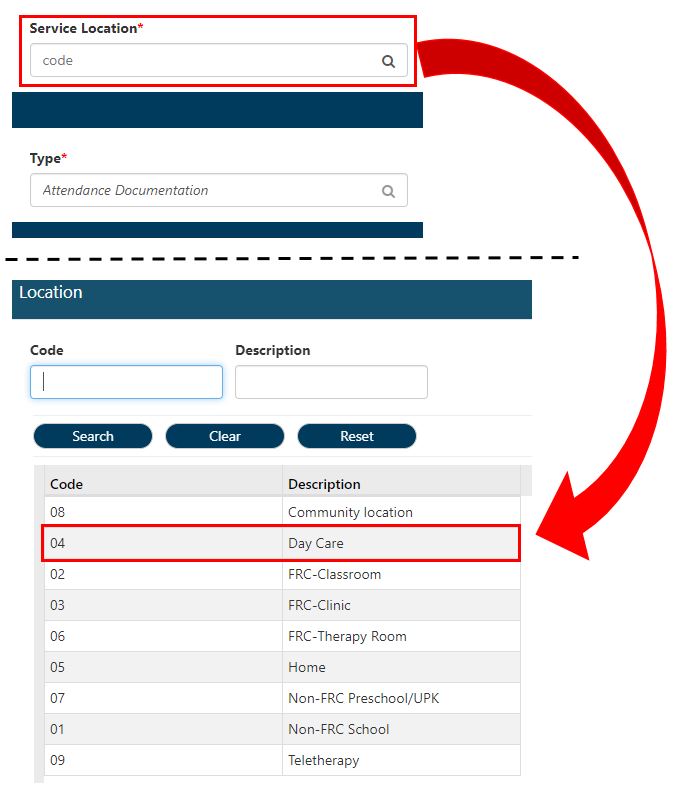
For my example, I have a service event for Attendance Documentation that requires a Service Location field. My user-defined look-up table for Location has 9 options to select, but for my Day Care program, only one location should ever be used for this service event: Day Care. My Day Care staff are sometimes erroneously selecting a different location and are complaining about having to do the extra clicking required to fill in a field that is always the same value.

The simplest way to handle this is to use the default value on my service location field in order to make sure the value we want to be there is always selected, but when I enter ‘Day Care’ in the default value for the picklist field, it doesn’t work. What gives?

Simplest Method: Hard-coded GUID

When you use Picklist fields on your form, the underlying data type is a Foreign Key ID, which means the data value actually being stored in the database is the GUID for the picklist item that you are selecting, NOT the description, shortcut code or any other column from the table being referenced. What we need to do here is provide the GUID for the picklist item that we want selected.

There are a few different ways to find the GUID for your intended picklist item. See Tips and Tricks: Two Methods for Finding a GUID for two methods.

Assuming you have the GUID, then all you need to do in the default value field of the service_location is enter the GUID surrounded by quotes.

Now the form defaults with “Day Care” selected for this field.

NOTE: When hard-coding with GUIDs, myEvolv Classic requires all upper-case letters in the GUID and myEvolv NX requires all lower-case letters in the GUID. If you are still using classic and intend to use the method below.

More Robust Method: getDataValue

This method is more robust because it works in both Classic and NX, though the over-use of getDataValue can cause system performance to slow.

Instead of hard-coding the GUID, we will use a getDataValue() call to lookup the correct GUID using the description of the item we wish to default.

For this method, you need to know some things about the lookup table you need to fetch the GUID from. In my example, I know that the LUT is a user-defined LUT, so the table is going to be user_defined_lut. I know that the primary key column for that table, the column I want the GUID from, is therefore user_defined_lut_id. And I also know that the column that contains the name of the item in that table is called description. With those bits of information, I can put together a getDataValue() call that will return the correct GUID and I can put that call into the Default Value attribute for my Service Location field.

getDataValue('user_defined_lut', 'description', 'Day Care', 'user_defined_lut_id');

The result is the same as above, with “Day Care” defaulting into the field on the form.

Other Possibilities

The possibilities are endless when it comes to default value logic, since the Default Value attribute accepts any JavaScript code that you might concoct. Whatever code you come up with, the end result must be a single GUID that is a primary key value from a record in the table being used as your picklist field’s LUT.

How To: Enforce ZIP+4 in Client Demographics

Some payors are beginning to require that client addresses utilize the ZIP+4 ZIP code in order to get paid.  The ZIP code field in myEvolv has a datatype of Zip Code which appears to be a string field that allows up to 10 characters.  This means that you can store a 5-digit ZIP code or a ZIP+4 in the field.  Furthermore, the functionality for auto-filling the city and state fields based on the ZIP code will work with either type of ZIP code.

One thing that is lacking is the ability to force users to input a ZIP+4 in the ZIP code field.  The following guide will show how you can add some form validation to the Client Demographics form that will help to prevent users from entering only the 5-digit ZIP code.  While we will be looking at only one set of forms, you should be able to apply the same changes to other forms and address subforms to achieve the desired result elsewhere in the system that addresses are collected or edited.

Setup New Demographics Formset Member

For the purposes of this demo, we are going to modify the Client Demographics form.

This is a system form and we cannot directly make changes to it so instead, we must create a custom demographics form, address subform and formset member so that we can make the changes we want.

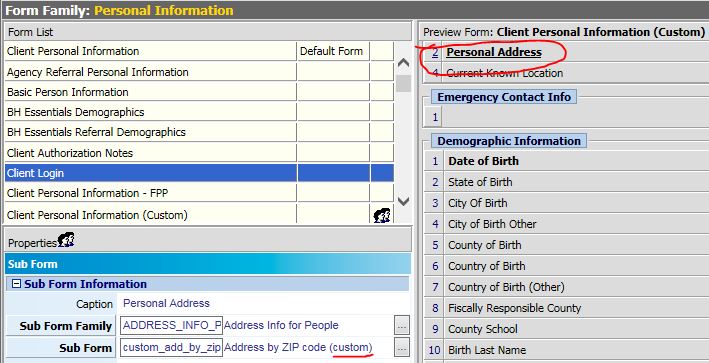
Copy the ‘Address by ZIP code‘ Form

This form is in the Address Info for People form family. This is the form that is used for the Personal Address subform on the Client Demographics.

Copy the ‘Client Personal Information‘ Form

This form is in the Personal Information form family and is listed at the top as the default form. This is the main form that loads when you go to the Client Demographics formset.

On your newly-copied, custom version of this form, swap your custom Address by ZIP code subform in for the default Address by ZIP code subform.

Remember that when you copy and begin editing these system forms, a good rule of thumb is to only add to the form or carefully edit what is on the form so that you do not have downstream effects. Avoid deleting elements. If you don’t want them to be visible, simply hide them.

Create New Formset Member

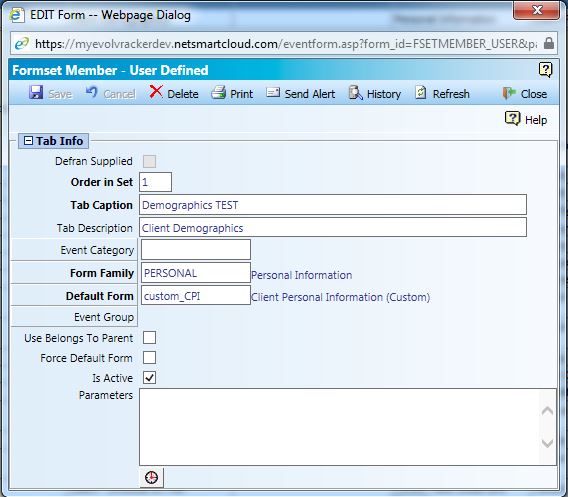
Select the Client Personal Information FormSet in Formset Maintenance. By Default, the Client Demographics formset member is ordered #1. Add a new formset member and copy the settings for it just like the system default Demographics formset member EXCEPT that we will be using our custom Client Personal Information form instead of the system form in the Default Form field.

With the new formset created, remember to make it available to all navigation schemes which need the ZIP+4 validation. In order to avoid confusion, you can make the default formset member unavailable to those with the new formset.

Pro Tip: I temporarily put “TEST” in the Tab Caption of my custom formset so that I could find it easily when adding it to the navigation schemes.

You now have a separate and customizable Client Demographics formset to play with in your system

Modify Forms to Validate for ZIP+4

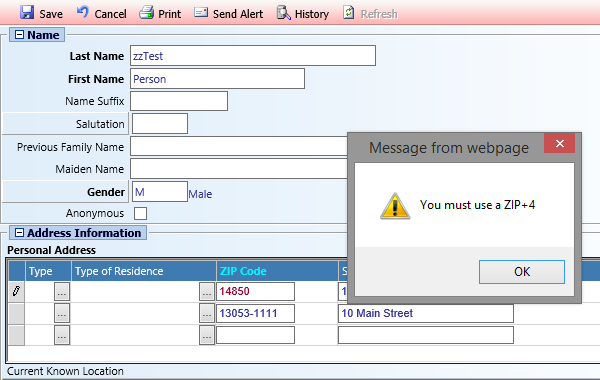
We will need to make changes to both of our forms in order to cover all of our bases. Our method for validating is to check the subform zipcode field when it is changed and determine if the zipcode entered is comprised of 10 characters. If the zip code is other than 10 characters, we will alert the user that they must enter a ZIP+4. If they ignore the warning and attempt to save anyway, we will prevent the save and alert them again that a ZIP+4 must be entered.

Custom ‘Client Personal Information’ Form

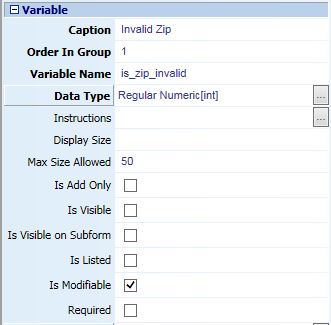
Step 1) Add a variable to the form just above the Personal Address subform. This variable will be used to store our ZIP code validation state that we will check before saving.
I named my variable is_zip_invalid and gave it a Regular Numeric datatype. You can set your variable to be not visible.

Step 2) Add the following code to the form’s “Before Save Code” property:

if(getFormElement('is_zip_invalid') == '1'){{
alert('You must use ZIP+4');
formValid = false;
}}

The code above checks to see if the value of the variable we just created is ‘1’. If it is, then it gives an alert and tells myEvolv to abort the save because this form is not valid. On the subform, we will add code that will set the value this variable based on what is entered in the zip code fields.

Custom ‘Address by ZIP Code’ Form

Step 1) Add the following code to the ZIP Code field’s “On Change” property:
This code can go under the setAddressFromZip(this); line.

var zip = self.getElementFromXML(currentRowXML, 'zip_code');
if(zip.length != 10){{
window.parent.window.alert('You must use a ZIP+4');
window.parent.setFormElement('is_zip_invalid', 1);
}} else {{
window.parent.setFormElement('is_zip_invalid', 0);
}}

The code above creates a variable named zip and assigns it the value that user enters into the ZIP Code field. The script then checks to see if the value is 10 characters long. If it is not, the code produces an alert to remind the user that a ZIP+4 is required and then sets the value of is_zip_invalid on the parent form to 1. If the value is 10 characters long, the script sets the value of is_zip_invalid on the parent form to 0.

Step 2) Add the following code to the form’s “Before Save Code” property:
Since it is possible for users to open the subform in a new window, we also need to do some validation on the subform itself in case a user ends up adding or editing addresses via this method/

var zip = getFormElement('zip_code');
if(zip.length != 10){{
alert('You must enter a ZIP+4 in order to save');
formValid = false;
}}

The above code does the the same thing that the “Before Save Code” from the other form does. The only difference here is that we have direct access to the value entered in the ZIP code field so we use that to validate the form rather than the variable flag.

When put altogether, you will have a custom Client Demographics formset that will warn users at the time of changing a ZIP code field if they are not entering a ZIP+4 and will not allow saving until the ZIP code is fixed.

One Vulnerability

The way that this is setup, the value of our variable is_zip_invalid is changed any time a zip code is updated so if the last zip code altered is valid, all zip codes will be accepted as valid. So for example, let’s say that I edit two zip codes on the form. On the first one, I only put in the 5-digit ZIP code. I get an alert telling me to use the ZIP+4 and my variable gets assigned a value of ‘1’. Next, I close the alert and alter the second ZIP code and this time I enter the ZIP+4. Our code executes to check that the ZIP code I entered here is valid. It sees that it is and assigns our variable a value of ‘0’. The form will successfully save even though I still have a 5-digit zip in the first address that I edited.

More complicated code might be able to do a more thorough job of validating multiple zip codes before save but I haven’t figured that out yet.

How To: Add Additional Links to Formsets on a Form

When you setup a service form in myEvolv, the Link to Person is usually setup in such a way as to make the name display as a link on the form. Users can then click the link and it will take them to a formset where they can look up additional information about the client or complete additional tasks related to the client.

link-to-person

There may be times when you want to add more than one link to a formset on a single form.

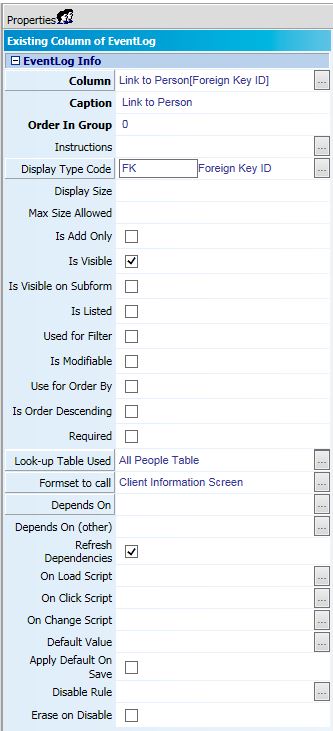
If you look at the Link to Person field in the form designer, you will see most of the setup that is required to create these links.

link-to-person-properties

Here, the people_id column is used to get the GUID for the client. Instead of just displaying that GUID, the All People Table is associated with the field. That renders the client’s name instead of the GUID. Then the Client Information Screen is used as the Formset to call. That renders the name as a link that opens the Client Information Screen when clicked.

Setting up another link might seem to be as easy as copying this setup on another field, but you quickly run into a couple hurdles that must be cleared.

Duplicate Fields

You cannot have the people_id column on your form twice so you need another way to add a link to the individual. Fortunately, myEvolv has a way to work around this using variables.

Variables are useful in this situation because we do not need the data stored in it to be saved to the database. We just want to hold some data while the form is rendered in the browser that will allow us to create the link and use it. We could go about this by creating a user-defined field that would be of foreign-key type and store a duplicate people_id GUID, but that would be overkill just to generate the link and clutter the database with redundant information.

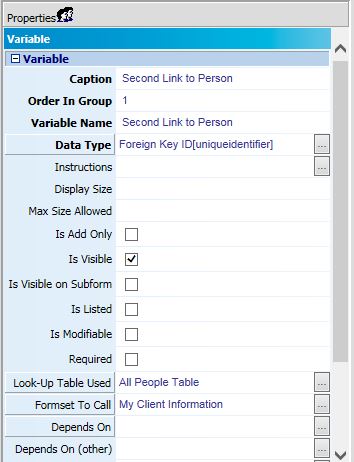
When you create your variable, you can set it up similar to how you would set up a user-defined field.

In this case, you want the Data Type to be Foreign Key ID. You can use the All People Table as your Look-Up Table Used. Finally, you can choose the different Formset that you wish to call from this link to the person.

second-link-to-person-variable-properties-1

Default Value

If you saved your form at this point and tried it out, you would notice that your new variable field is empty and if you left it modifiable, you would need to select your client to get the link. That’s because we need to give the variable a default value.

The people_id field has some automatic default value functionality based on the fact that you are entering the event from a client’s record. myEvolv is setup to default some fields automatically based on the service track information – things like client, program and facility will fill in automatically when entering services from the Service Entry area because based on which program band and the client’s facility placement information, myEvolv is able to determine what the default value should be.

Our variable, on the other hand, has no such built-in functionality and so we must explicitly provide it with a default value to pre-populate.

To provide a default value in this case, simply put parentValue in the Default Value property of the variable. parentValue is equal to the selected client’s GUID and it is the value that people_id uses behind the scenes to pre-populate itself.

Now when you open your form from service entry, it should look something like this:

second-link-to-person

Each link to person opens a different formset.

How To: Prevent Backdated Entries

This may not be the only or even best way of preventing backdated entries in myEvolv but this method worked for me in a recent configuration.

Scenario

We wanted our prescribers to be able to provide a Script for Therapy Services to children in our preschool services program from myEvolv. Scripts for Service must have a start date on them and that start date needs to be no earlier than the date indicated on the child’s IEP but cannot but previous to the date that the script is being signed.

Further, an administrative assistant was going to be setting up the scripts in myEvolv and then the prescribers were going to be reviewing and e-signing them. We could imagine a scenario where the administrative assistant put a date, for example (9/1) on the script, believing that the prescriber would e-sign it on or before that date but the prescriber does not get into myEvolv to sign it until after that date has passed and then the script gets e-signed as though it were backdated. We needed a way to prevent the start date from ever being previous to the approved date while also allowing the start date to be in the future.

Form Design
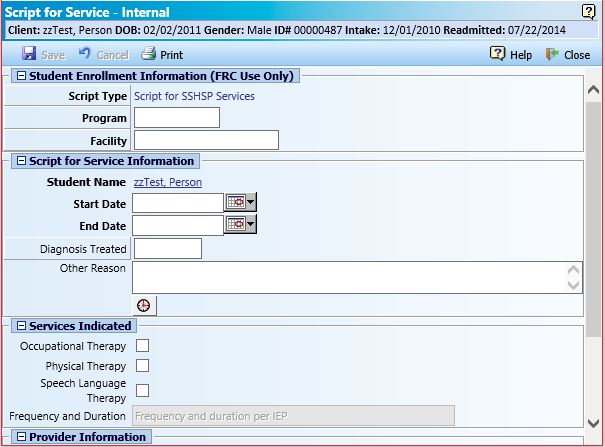
script-for-service-form

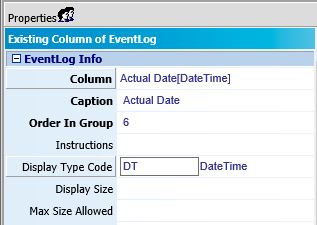
The actual_date field was not suitable for use as the script start date since we needed to be able have multiple scripts that start on the same day for an individual. If I set the actual date as ‘Date Only’ Display Type Code, then two scripts in the same day would overlap at 00:00 AM. In this case I ended up creating a new database field for my Start Date and kept actual date on the form, receiving todaysDate() as the default value. This more or less prevents the service overlap problem. My new database field is named udf_rx_4_svc_start and is Date Only.

The end date on the script is using the expiration_date column and is also using the Display Type Code “Date Only”.

Before Save Code

The first task to accomplish is to prevent a user from saving the form with a backdate on it. For this I used the Before Save code property on the form. This code executes every time that the form is saved BUT because of the algorithm myEvolv uses to save form data, the udf_rx_4_svc_start column in the database will only be updated if the form field has been flagged as being modified. This is something that I was not able to figure out how to do in the Before Save code yet and is largely responsible for what feels like a more-complex-than-is-strictly-necessary-solution — more on that later.

First step is to get the value that is on the form field and turn it into a JavaScript date object.
var start = new Date(getFormElement('udf_rx_4_svc_start'));

Second step is to get today’s date and turn it into a JavaScript date object. todaysDate() is a myEvolv form function that you can use to get today’s date in a format suitable for placing in a myEvolv form field.
var today = new Date (todaysDate());

With that accomplished, we can compare the two date objects to see if the date on the form is previous to today’s date and if so, set the form field’s value to today’s date.
if(start <= today){{setFormElement('udf_rx_4_svc_start', todaysDate())}};

Note that the { and } brackets are doubled up in the conditional statement. This will prevent the “Not a Valid XSLT or XPath Function” error previously discussed here.

With this code in place, when a new Script for Service is entered or a draft Script for Service has it’s udf_rx_4_svc_start field modified, myEvolv will check to make sure that the start date is not not in the past and if it is, update the start date to today’s date. If the date is today’s date or a future date, it is left as it is.

Full Code Block

var start = new Date(getFormElement('udf_rx_4_svc_start'));
var today = new Date (todaysDate());
if(start <= today){{setFormElement('udf_rx_4_svc_start', todaysDate())}};

On Load Script

Just the Before Save Code alone would not be enough to prevent backdating. We still have the possibility of someone simply opening the draft and e-signing the form as in our scenario where the prescriber gets into myEvolv to e-sign scripts later than intended. Even if the form is edited in some way, if the Start Date is not touched, the Before Save code will execute but the column will not be flagged as modified and myEvolv will ignore it when updating the database. My approach here was to try to update the form as it loads upon viewing or editing so that myEvolv would see the column as modified when saving. I was unable to get the toolbar containing the ‘Save’ button to recongize the change, however, I was able to still get the desired effect another way.

The first thing to keep in mind with the On Load Script is that the form DOM has not loaded yet when this code runs. You can not therefore target the form field with JavaScript, update its value and focus/blur to make myEvolv notice a change to the value as we can with the On Click and On Change Scripts. Instead, you have to manipulate the Record XML Data before it gets loaded into the form.

The first step here is to determine whether the script had been signed. If it has been signed, it will have a non-null date_locked value. We check for this by using the myEvolv form function getDataValue() and then seeing if the form is being opened for viewing or editing.

var locked = getDataValue('event_log', 'event_log_id', keyValue, 'date_locked');
if(locked == '' && formXML.documentElement.getAttribute('formAction') == 'EDIT'){{
...
}}

This code gets the value of date_locked from the event_log table where the event_log_id is equal to keyValue which is a variable equal to the event log id of the current event you are looking at.

Then the code checks to see if there is a locked_date. If the locked date is blank AND the form is opened for editing, then it will execute the rest of the code. So basically, only perform a date manipulation if we are still working with a draft. If you leave this piece out then every time you look at a completed script for service in the future, myEvolv will overwrite the form field value for start date to be today’s date and you will be scratching your head.

Inside the ellipses we start the date manipulation. First we load the node for udf_rx_4_svc_start from the XML Record so that we can manipulate it.
node = formXML.documentElement.selectNodes("form_group/form_item [@column_name = 'udf_rx_4_svc_start']");
node = node[0];
This code returns an Array of all of the nodes in the XML documents with the column_name “udf_rx_svc_start”. There is only one but it is in an array so we load it into our variable directly on the next line.

Then we get the start date value and turn it into a JavaScript date object.
var start = new Date(node.text);

Then we do the same for today’s date.
var today = new Date(todaysDate());

Now we check to see if start date is before today’s date and if so, we will update the text of the node to be today’s date.

if(start < today){{
node.text = todaysDate();
node.setAttribute('modified', 'true');
...
}}

I also set the “modified” attribute to ‘true’ for this node. I don’t know if that makes a difference in this setup but I am including it since that is how my code is and it works.

If you leave the code as it is like this, when the form loads, if the start date is previous to today’s date, the value on the form will have been updated to today’s date AND the form field will be maroon like it is when a form field is changed. However, you will also notice that the “Save” button is nevertheless disabled and a user would be able to e-sign the service without being forced to hit save. And apparently, even though a “saving…” dialog pops up upon e-signing, the form is not saved. I tried a bunch of things to try to get the save button to enable and the e-sign button to disable but it is difficult since the form DOM is not loaded at the time that the On Load script runs. In the end, I decided to just call the save form function directly.

So where the ellipses above are, I put
SaveForm2();

The end result here is that when the form is opened for editing, if the start date is before today’s date, myEvolv will update the start date to be today’s date and then save. The users will see the form start to open and then abruptly close if the conditions are met. When they reopen it, they will find that today’s date has been updated to today’s date and they are free to e-sign.

Full Code Block

var locked = getDataValue('event_log', 'event_log_id', keyValue, 'date_locked');
if(locked == '' && formXML.documentElement.getAttribute('formAction') == 'EDIT'){{
node = formXML.documentElement.selectNodes("form_group/form_item [@column_name = 'udf_rx_4_svc_start']");
node = node[0];
var start = new Date(node.text);
var today = new Date(todaysDate());
if(start < today){{
node.text = todaysDate();
node.setAttribute('modified', 'true');
SaveForm2();
}}
}}

Bonus: After Save Code

Since the form is going to be auto-saving itself, I also added a snippet of code to the After Save Code that keeps the form from closing after save:
window.closeAfterSave = false;
myEvolv EventLog Date and Time Fields MEGAPOST

Last Updated:  August 23rd, 2016

When you are configuring forms in myEvolv, it can be tricky determining how to handle dates and times. Different myEvolv date and time fields are used within the system in different ways. Some of the implications of using one EventLog date or time field over another might not be apparent until the form has been in use for a while, at which point it might be too late.

This post will be an attempt to layout everything I figure out about the way the various EventLog date and time fields work in myEvolv to aid in making a more informed choice about which to include on forms.

Date and Time Columns Available in the EventLog

As of v9.0.6994.136, the EventLog table contains the following date and time columns:
You can click a column caption to skip down to the details for that column

Caption Column DataType
Actual Date actual_date DateTime
Amended Date amended_dt_tm DateTime
Approval Date Internal QI/MIS approved_qi_date Date Only
Approval External Date approved_external_date Date Only
Approved Date approved_date Date Only
Date Entered date_entered DateTime Updated
Date Locked date_locked DateTime
Date timestamp timesheet was submitted date_submitted DateTime
End date end_date DateTime
Expiration Date expiration_date Date Only
Final Approval Date final_approval_date Date Only
Proc Discontinued Date proc_discontinued_date DateTime
Procedure Completion Date proc_completed_date DateTime
Reconciliation Date reconciliation_date DateTime
Target End Date target_end_date Date Only
Verified Date verified_date DateTime
Duration duration Time Duration
Duration Other duration_other Time Duration
Planning Time planning_time Time Duration
Travel Time travel_time Time Duration

DataTypes and Display Code Type

Date and Time data can be displayed and captured in a few different ways on forms depending on the Display Type Code that is indicated in the form field’s properties

DateTime Displays a date field and a time field datetime-display
Date Only Displays a date field with no time field date-only-display
Time Displays a time field with no date field time-display
Time Duration Displays a time duration field time-duration-display

Default Display Code Type

date-field-properties

In the form designer, the default Display Code Type is based on the DataType of the column:

  • If you select a DateTime column, the Display Type Code will default to DateTime
  • If you select a Date Only column, the Display Type Code will default to Date Only
  • If you select a DateTime Updated column, the Display Type Code will default to DateTime
  • If you select a Time Duration field, the Display Type Code will default to Time Duration
  • If you select a Time Only field, the Display Type Code will default to Time (there are currently no Time Only columns in the EventLog table but you may wish to create a user-defined field column of this type so it is included here)

Changing Display Code Type

In some cases, you can change the display type for the field.

  • You CAN use a Date Only Display Code Type on DateTime and DateTime Updated columns
    • This will allow you to display or capture dates without a time when you want to use one of the DateTime columns.
    • When a DateTime column is captured using Date Only Display Code Type, the time will be inserted into the database as 00:00 AM
      • This has implications for service overlaps – multiple services with no captured specific time for a client in a single day will have the same time


  • You CAN* use a Time Display Code Type on DateTime and DateTime Updated columns
    • *myEvolv will not prevent you from saving a form with a field setup this way, however it is not terribly useful (see below)
    • This will allow you to capture times without a date, however it will display a date/time string.
      • datetime-disp-time-after-save
    • When a DateTime column is captured using Time Display Code Type, the date will be inserted into the database as 1/1/1900


  • You CANNOT use a DateTime Display Type Code on a Date Only column
    • Date Only columns do not have a corresponding _tzo column in the database to store the time value that you are capturing on the form. Upon attempting to save, you will receive an error that will prevent the save.


  • It is UNKNOWN whether you can use a DateTime Display Type Code on a Time Only column
    • I will investigate this soon.


  • You CAN use a Time Display Type Code on a Time Duration column
    • This will allow you to capture a time without needing a date value.
    • This may have unforseen consequences elsewhere in myEvolv since the system expects this data to represent a duration, not a timestamp — requires more investigation

Individual Column Details

Actual Date | actual_date

The actual_date is an important date field in the EventLog when it comes to events. It is meant to represent the actual date and time that an event occurred.

Where else is it used?

It is the date and time that displays in the Service Entry listing in the “Actual Date-Time” column
service-entry-actual-date

The actual date also displays in the Treatment Plans listing in the “Start Date” column
plan-development-actual-date

The actual_date appears in the “Actual Date” column in the Service/Case notes & Planning Approval area of myEvolv. It is displayed as Date Only
actual-date-supervisor-module

Service Overlaps

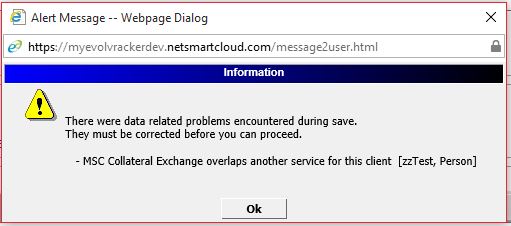
myEvolv does not allow service events of the same type to overlap for a client. Therefore if you are setting up an event that could occur multiple times in a single day, you must display the actual_date as a DateTime field on the form and have clinicians input a time. If you display the actual_date as Date Only, all services will be put into the database at 00:00 AM and myEvolv is prevent the second service of the same type from saving because of an overlap. If you do not wish to have the time displayed on the events after the initial entry, you could use a different “Edit Form” in the event configuration which displays the actual_date as Date Only.

service-overlap-error


Amended Date | amended_dt_tm


Approved Date Internal QI/MIS | approved_qi_date


Approval External Date | approved_external_date


Approved Date | approved_date

The approved_date appears in the “Approved Date” column in the Service/Case notes & Planning Approval area of myEvolv. It is displayed as Date Only
approved-date-supervisor-module


Date Entered | date_entered

The date_entered column is used by myEvolv to store a timestamp for when an event is first saved in the system.

This column is displayed on the Clients Services & Treatment canned reports, which show both the actual_date that clinician’s enter on their services and the entered_date that the system generates so that supervisors can check for contemporaneity of entries.

The difference between the entered_date and the actual_date is used to determine if a service has been documented contemporaneously based on the contemporaneous rule defined in the billing setups and when running a Contemporaneous Rule Report canned report.

Since this column is intended to store system-generated timestamps, it is not recommended that you add this field to a form except in the case that you would like to display the date and time that an entry was entered into the system by a clinician. In this case, the field should be made not-modifiable.

Where else is it used?

The date_entered appears in the “Entry Information” column in the Service/Case notes & Planning Approval area of myEvolv.
date-entered-supervisor-module


Date Locked | date_locked

The date_locked column is used by myEvolv to store a timestamp for when a service is last e-signed by the entering clinician this locking the event from being edited.

The system generates the timestamp when a service event is electronically signed which can occur in three circumstances:

  1. Upon saving a service if the service is configured to “Auto-Submit/Sign”. In this case, the date_locked column will have the same timestamp as the date_entered column.
  2. Upon clicking the “Electronically Sign” button if the service is configured for “Electronically Signed”
  3. Upon clicking the “Submit” button if the service is configured for “Can Submit”

If a clinician clicks the “Remove Electronic Signature” button on an electronically signed service, the date_locked column will become NULL.

Since this column is intended to store system-generated timestamps, it is not recommended that you add this field to a form. The date_locked will display on electronically-signed services automatically (see below).

Where else is it used?

The date_locked displays as the “Date” with the signature image on electronically signed
locked-date-sig-image

and submitted services for the “Signed by” signatures
locked-date-sig-image-approved

[the “Date” for the “Approved by” signatures come from the approved_date column]

The date_locked appears in the “Submission Date” column in the Service/Case notes & Planning Approval area of myEvolv. It is displayed as Date Only
locked-date-supervisor-module


Date timestamp timesheet was submitted | date_submitted


End date | end_date


Expiration Date | expiration_date

The expiration_date column is intended to be used to indicate the expiration date of a treatment plan in myEvolv.

Where else is it used?

The expiration_date appears in the “Expiration Date” column in the Plan Development area of myEvolv.
expiration-date-plan-development


Final Approval Date | final_approval_date

The final_approval_date column is used by myEvolv to store a timestamp for when the final step of a route has been completed.

Since this column is intended to store system-generated timestamps, it is not recommended that you add this field to a form. The final_approval_date will display in the Routing History of routed treatment plans.

Where else is it used?

The final_approval_date appears in the “Final Approval Date” column in the Plan Development area of myEvolv.
final-approval-date-treatment-plans


Proc Discontinued Date | proc_discontinued_date


Procedure Completion Date | proc_completed_date


Reconciliation Date | reconciliation_date


Target End Date | target_end_date


Verified Date | verified_date


Duration | duration


Duration Other | duration_other


Planning Time | planning_time


Travel Time | travel_time


*ARCHIVE* How To: Default Value in Picklist Field

NOTE: An updated version of this post for myEvolv NX is available here: How To: Default Value for Picklist Field

You may find that a myEvolv form that you wish to use contains a picklist field that cannot be done away with even though the user is always going to be selecting the same item.  For instance, you may have a treatment plan for a program where there is only one category of goals but you have to select that category manually anyways.  Just like other fields in myEvolv, you have the option of setting a default value for a picklist field but it is a little trickier to setup than it is for text and date fields.  Defaulting values for picklist fields where there are no real choices to be made will save your clinicians time when doing their work in myEvolv.

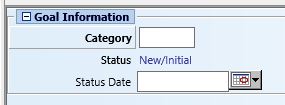
Some picklist fields have both a button that opens the picklist dialog and a place to type a code, which allows for faster entry for users who know the codes.

category-empty

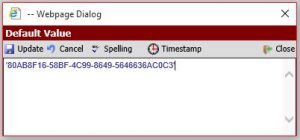
You might think that you can designate a default value in the form designer in the same way that you designate a default value in a text field since there is a sort of text field available.  If you try that, however, you will find that this does not work.  The difference is that this field is actually used to store a foreign key value and so the default value must be a foreign key (the GUID) and not the description or code values for the item that you wish to default in.  Remember to place it within single quotes as you would a default text value.

default-value-filled

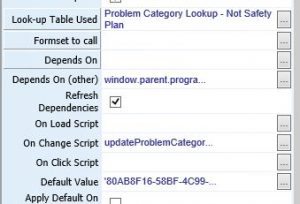
In my example, I needed the GUID for a custom treatment category named “Day Treatment”.  Looking at the field properties for this picklist field, I see that the Lookup table that is being used is ‘Problem Category Lookup – Not Safety Plan’, which tells me that I need to take a look at the ‘problem category’ table.

picklist-field-properties

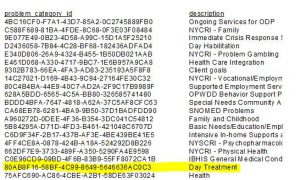
I pulled that table into Crystal Reports and made a quick and dirty report that shows the problem_category_id and the description and grabbed the GUID that corresponds with my Day Treatment category.

guid-crystal-reports

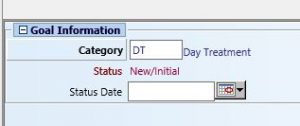
With the GUID used as the default value on the picklist field, now ‘Day Treatment’ is the default value on the treatment plan whenever a new Category component is added to the treatment plan.

category-filled

We are using cookies on our website

Please confirm, if you accept our tracking cookies. You can also decline the tracking, so you can continue to visit our website without any data sent to third party services.