One of the most powerful aspects of an electronic health record is the ability to link service documentation to a client’s goals and objectives and to ensure that the services provided are related to the clients current goals and objectives.
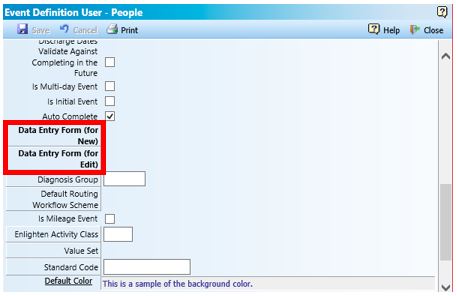
myEvolv provides a simple toggle setting to add a Treatment Plan Link on service documentation in the event setup.
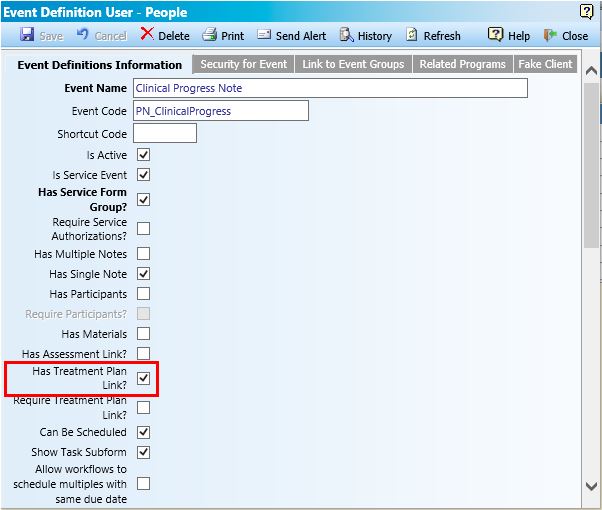
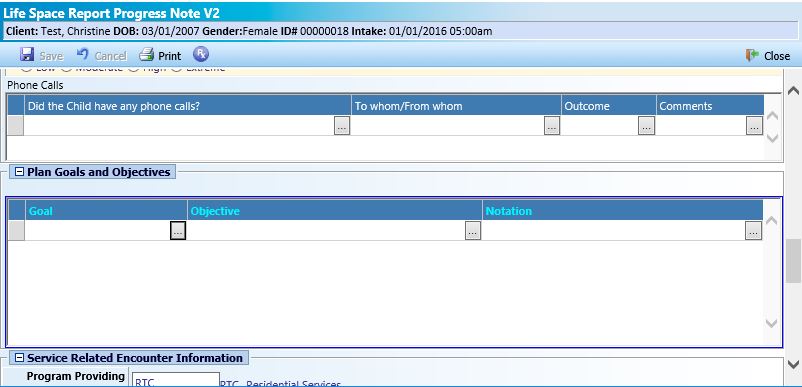
This setting adds a system subform to the bottom of your service documentation forms that includes a Treatment Link column for selecting a goal from the client’s treatment plan, an Additional Treatment Detail column for selecting a child objective or method from that goal and a Notation column for capturing a note.

After attempting to use the system subform for several months, we noticed a couple of things about it that we didn’t like. The main issue is that the subform does not filter to list only goals from the most recent approved plan. It lists all of the goals that ever existed for the client. In our programs, plans must be reviewed as often as monthly so the list begins to grow very quickly and we were finding that users were often linking old goals to their current documentation. Also, you are stuck with the subform being way at the bottom of your form, which isn’t always ideal.
I used the following method to create a better subform for our direct care workers to link their service documentation to treatment goals without having to sort through a huge list of goals and ensure they always picked goals that were currently in place.
Step One: Get the service_plan_header_id of the most recent completed treatment plan onto the service documentation form.
For this task, we can use a variable since we only need to filter at the point where the service documentation is being added. If someone opens last year’s event and the variable (which will not be visible anyway) has the current treatment plan’s service_plan_header_id in it, that doesn’t affect anything other than the subform’s Goal picklist, which will be locked since the event is complete.
I added a Custom String variable to my form with the name current_plan
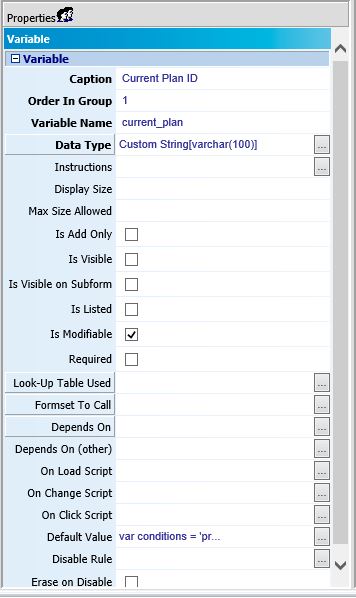
In order to get the service_plan_header_id of this client’s most recent treatment plan, I used the following JavaScript code for the Default value property:
var conditions = 'program_providing_service=\'\''+programPS+'\'\' AND actual_date = (SELECT MAX(actual_date) AS most_recent FROM service_plan_event_view WHERE people_id = \'\''+parentValue+'\'\' AND program_providing_service=\'\''+programPS+'\'\' AND approved_date IS NOT NULL)';
var plan_id = getDataValue('service_plan_event_view','people_id', parentValue, 'service_plan_header_id', conditions);
if (plan_id == null) {{
plan_id = 'NONE ON FILE'
}}
plan_id;
The first line of this code is setting up the SQL conditions that will be passed along in a WHERE clause query executed by the getDataValue() function. In my case, I wanted to be sure I got the most recent service plan event that matches the client for whom this service documentation is to be entered and matches the program providing service of the service documentation. The latter is necessary in case the client has more than one treatment plan at a time in different programs. The approved_date IS NOT NULL clause ensures that if there is a treatment planner working on a draft, the draft goals do not list for the direct support staff doing service documentation.
In the second line, we use this condition statement as the fifth argument in the getDataValue call. Here we are looking for a treatment plan in the service_plan_event_view that has the matching values from above and returns the service_plan_header_id
Then I checked to make sure a service_plan_header_id is returned. If one is not returned, I set the variable plan_id to be ‘NONE ON FILE’ mostly as a way to make sure my code was executing. This will be the value that fills in if someone goes to add service documentation for someone who has no plans on file for that program providing service.
Finally, I echo the value of plan_id so that the value will populate the form field.
Step 2: Create a subform similar to the system version to add to your service documentation form.
For my purposes, the subform didn’t need to be much different than the system subform. We wanted the direct support staff to select the Goal and Objective that was worked on and then enter a note related to the specifics of the objective selected.
I copied the default form in the Treatment Plan 2 Event Link – People B2E form family and made modifications.
This is what the overall form looked like in Form Designer when I was done:
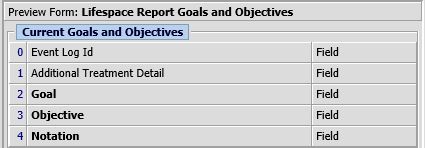
Event Log Id and Additional Treatment Detail were from the original form. I left them on but pushed them to the top and made them not visible. Notation is also the same field as from the original form but we decided to make it required.
Goal is the Treatment Link from the old form. I changed it to use the Treatment Plan Goals by Plan Look-up Table so that I could use the service_plan_header_id as a parameter.
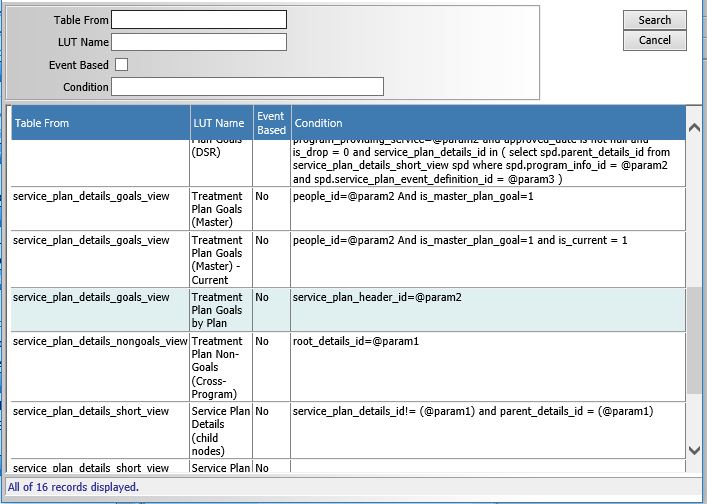
For the Depends On Other property, I used the code
getParentFormElement('current_plan')
This gets the value of the variable we created in step one and uses it as that @param2 shown in the Look-up Table Picklist’s Condition column. This is the piece that will filter the Goals picklist on the subform to only list the Goals from the treatment plan with the service_plan_header_id we supply it.
Finally, I created a new database field to use for our Objective field. I set it up as a Foreign Key type of field and I used the Service Plan Details (child nodes) Look-up Table.
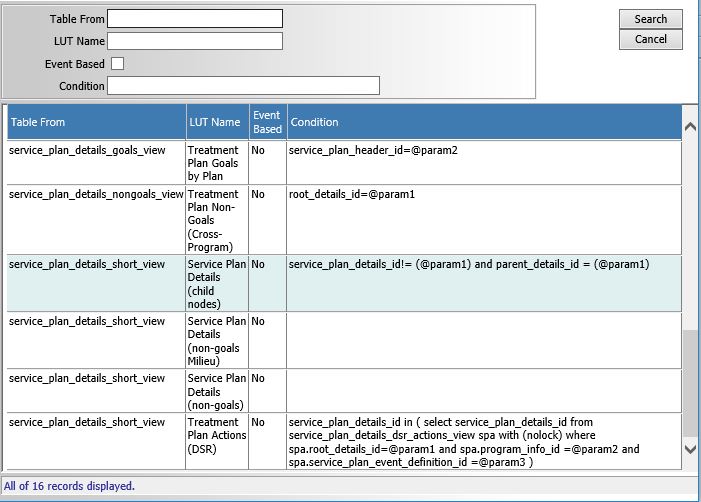
This look-up table uses the service_plan_details_id to filter for a list of objectives that belong to that service_plan_detail . In this case, we are selecting a service plan detail in the Goal field, so we can filter this LUT to only show the Objectives that belong to that goal. To do that, I just select the Goal field as the Depends On property.
***Note: You can go one level deeper and add a picklist field to the subform for the methods by repeating the steps for making the Objective field except selecting the Objective field for Depends On since Methods belong to Objectives the same way that Objectives belong to Goals.***
Once you have your subform ready (remember to check the box for Is Visible on Subform!), add it to your service documentation form. Assuming your variable from step one is pulling correct service_plan_header_id’s, you should see only the most recent active goals in your Goal field and then only the objectives for that goal in your Objective field.
