myEvolv Tips: Subform Field Manipulation

Credit for figuring these out/discovering them goes to Perry. I find myself referring to them in a training binder I got from last year’s NY Training Summit and figured it would be easier to just get them up on the web so I don’t have to go hunting for that binder every time. The following code works for Classic.

Subform Considerations

Subforms have to be handled differently than forms when it comes to JavaScript because while in the form designer, the two things look identical, the way that myEvolv renders a subform in the browser is very different from how it renders a form. But it isn’t radically different and the main changes account for the fact that a subform can have one or more rows and so you need to be more specific about which field you are trying to manipulate so that you don’t change every line simultaneously.

Scenario 1: Get the Value of a Subform Field

This code is for use within the subform, e.g. if you want to default the value of one field based on the value of another on the same subform.

self.getElementFromXML(currentRowXML, 'column_name');

Note the self object is being used here. This is the subform object as distinguished from the parent form object. The parameter currentRowXML then further narrows it down to the current record/row on the subform that you are concerned with.

Scenario 2: Set the Value of a Subform Field

Again, for use within a subform, this code can be used to set the value of a field in the same subform, e.g. when you want the On Change event to auto-populate a field.

this.form.'column_name'.value;

If you are checking a checkbox, use this code:

this.form.'column_name'.checked = true;

Note that in this code, you do keep the single quotes in the code for it to work properly. All you change is the column_name

Scenario 3: Get the Value of a Parent Form Field

With this code, you can get the value of a field in the parent form based on an action in the subform.

window.parent.getFormElement('column_name');

Note the window.parent is the only difference from the code you would use on the parent form. This is what allows your code to ‘jump up out of the subform’.

Scenario 4: Set the Value of a Parent Form Field

Maybe you figured it out by now but you can use the same small change to set values on the parent form from the subform.

window.parent.setFormElement('column_name', value);

Scenario 5: Trigger an Alert from the Subform

Alerts are useful in guiding user activity and you can trigger them from subforms. Similar to the last two, the trick is moving back up the DOM to the parent form to trigger it.

window.parent.window.alert('Alert Message');

Other Possibilities

It is possible to go the other way and get and set values on subform records from the parent form, however, it becomes a much more complex problem that requires very specific solutions for very specific challenges. That is because of the One-to-Many relationship that the subforms have with the parent form. For these types of situations, you will probably be targeting the subform itself and then looping through each record to get or set values.

Tips and Tricks: Two Methods for Finding a GUID

In a previous post I used Crystal Reports to find the GUID associated with a program in my tables. Since Crystal Reports is not an option for everyone, I thought I would share two methods that everyone has for discovering the GUID of a picklist item in myEvolv.

Method 1: Form Field Manipulation

If you are trying to determine the GUID value for a picklist field, you can make a quick change in the for designer to expose the GUID.

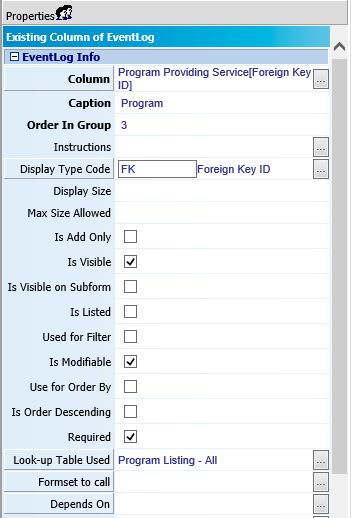
In this example, I am going to try to figure out the GUID for my Preschool – Classroom program. On the form below, I have the program_providing_service field which uses the “Program Listing – All” lookup table. I have selected ‘Preschool – Classroom’ on the form and will save the form with this value.

program providing service field as foreign key

Next step is to go to the form designer and edit this form. The program_providing_service field on the form is a Foreign Key field and it is associated with a lookup table. This accounts for how it displays on the form as a picklist field where instead of seeing the GUID of the program providing service, you see its description value from the lookup table.

program providing service field properties

If we change the Display Type Code of the field to Regular String and clear the value for the lookup table, the Program field will display on the form as a text field and expect the user to type in a GUID. However, on forms where the value already has been entered and saved, the value will display as the GUID of the item selected. So we will change the Display Type Code to Regular String and then Save the form.

Upon re-opening the saved event from before, we see the GUID of ‘Preschool – Classroom’ program displayed in the Program column. Once you have your GUID, you can revert the changes made to the form.

program providing service displayed as guid

Method 2: Data Insight Report

This method requires a little knowledge about the tables in myEvolv but works when you can’t edit the form to use method 1.

Navigate to Reports >Data Insight Report Writer >Custom Reporting >Custom Reporting

Click Configuration then Click “Create a new virtual view”

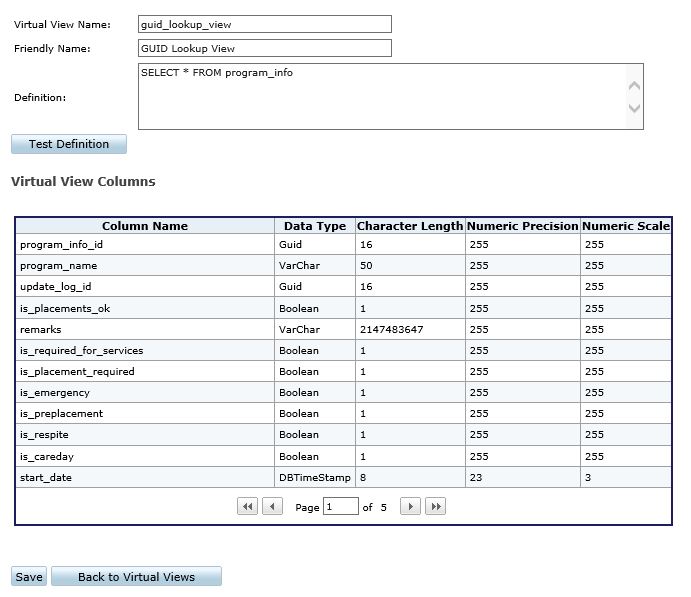
Give your virtual view a name and friendly name and then use a simple SQL statement to get everything from the table that contains GUID. In my example, I am looking for everything from the program_info table because that is where all of the programs are kept. user_defined_lut contains all of the user defined lookup table values combined together.

So I will use SELECT * FROM program_info

virtual view

Save the view and then click “Report Management” and click “Add”. Select “Tabular Report With Header”

Select your virtual view as the data source and click “OK”.

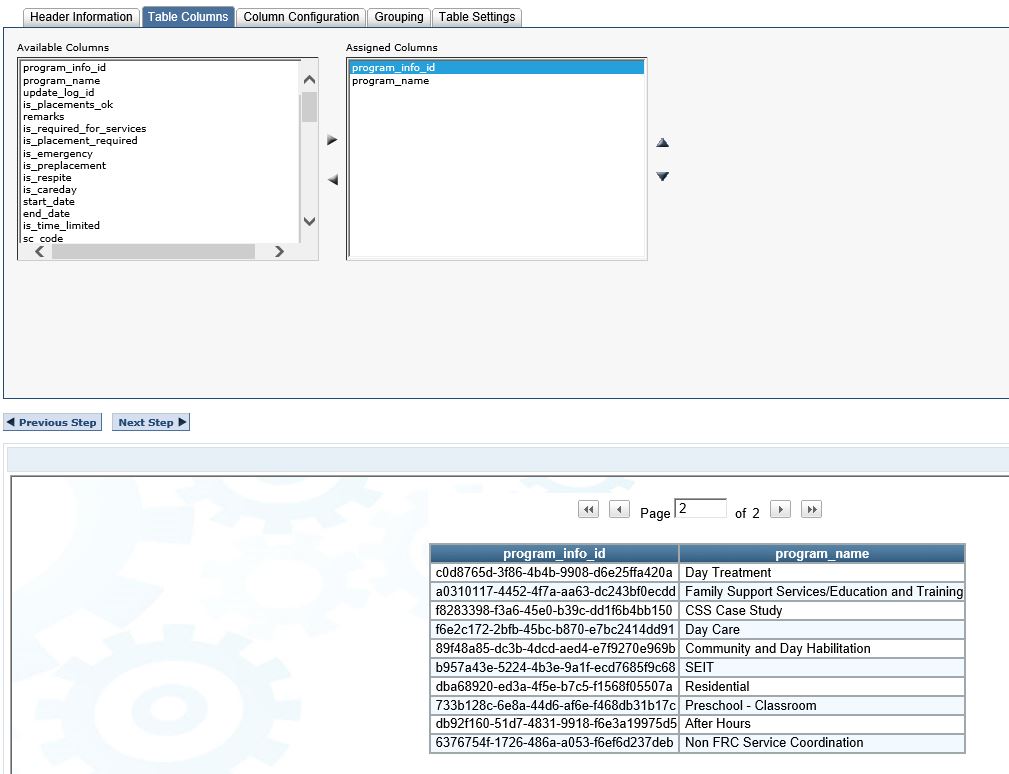
In the Report designer, add the Primary Key Column (in this case program_info_id) – it is usually the one with the same name as the table and then _id at the end.
Also add the description column – in some cases this column might have a different name – for my example, the column I want is program_name.

At the bottom of the screen, you will see a preview of your report with the GUID and the Description so that you can tell which GUID belongs to which item.

report results

Tips & Tricks: Use Images in Memo Fields

The following post outlines how to use images in memo fields as was shown in my presentation at CONNECTIONS2016.

memo-field-after-save

Memo fields in myEvolv are unique because they are rich text fields. This means that they will retain any markup that is done to them so that you can do things like change the font size and underline text that is being input into the field. When you are changing the formatting of the fields, HTML markup is being applied to the text behind the scenes. Because of this fact, we can use other HTML tags in a Memo field and have the browser render them just like it renders the rest of the webpage. One place where this can be useful is in adding images to treatment plans for individuals with intellectual and developmental disabilities.

With the Memo fields, you can just enter the HTML markup in the field itself and after saving, you will see the result. The challenge is therefore not in manipulating myEvolv to allow HTML but rather figuring out a way for clinicians who are not web developers to use pictures in their treatment plans.

Form Setup

There isn’t a lot to setting up the form but you have to keep this in mind: When you setup a text template, you must designate the table and columns for which the template will be available. In my agency’s case, the treatment plan had three fields where we wanted to use images: Likes/Interests, Dislikes/Fears, and Strengths/Skills. Each of these has it’s own user defined Memo field so that other programs using the progress_note field would not have the option of choosing one of my image text templates. It was also important to separate them so that someone didn’t accidentally put an image from the wrong category into the wrong field.

Note: If you setup a new Memo field before you setup the text templates for it, the template button on the Memo field may be disabled. You can fix that by making a change to the form so that it rebuilds the Form XML or run the Create Forms XML utility to awaken the button once a text template is linked to the field.

Preparing the Markup

The first step is to find the image that you want to use. The image needs to be on a web server somewhere because you are going to link to it rather than upload it. Ideally, your agency would set one up so that you could be sure the images that you use won’t ever disappear from the internet, leaving your old plans with broken image links. If that is not an option, you can use images from anywhere on the web. You will need the URL for the image itself. You can get that by finding an image on a website, right clicking it and selecting “Open Image in New Tab” or a similar option, depending on browser. Then you simply put the url into an img tag:

<img src='http://blog.corbinet.com/wp-content/uploads/2016/10/bunny.jpeg' />

bunny

The image tag that I created above will render an image is that is 543 pixels wide… too big for my plan, so I need to add some CSS styling to the image tag to make it smaller. Again, if you are hosting your own images, you could just make the raw image the size that you want and avoid this step. Another thing that I wanted to do is have the pictures site next to one another if I put multiple in a row so I am going to have the images styled to display inline.

<img src='http://blog.corbinet.com/wp-content/uploads/2016/10/bunny.jpeg' style='width: 150px; display: inline' />

bunny

You can add other styling as you see fit using inline CSS.

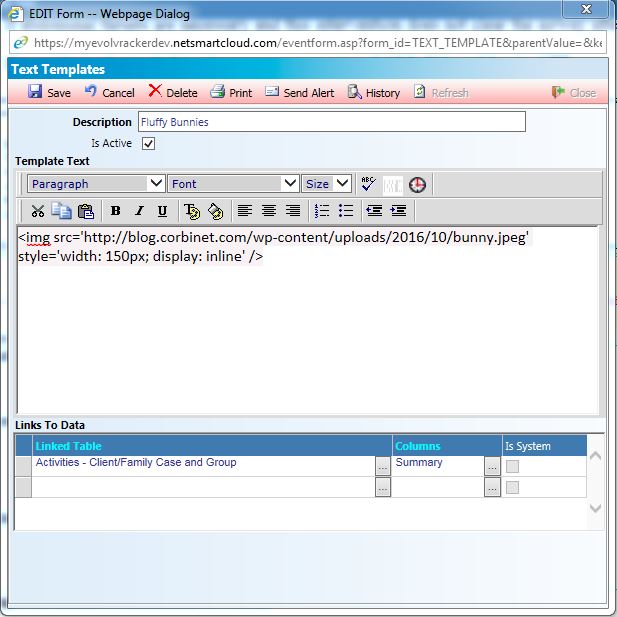
Setting up the Text Template

text-template-setup

Give your text template a descriptive name since this is all the clinician will see in the list of templates when they must choose.

At the bottom, link your template to the correct table and column that you setup on your form.

For the template text, you will enter the img tag that you created. Note: I have found that you cannot type this img tag into the field because it will begin to add markup to the url that you are using for the src and that breaks the image. Instead you must paste the img into the Template Text field and save without making any changes.

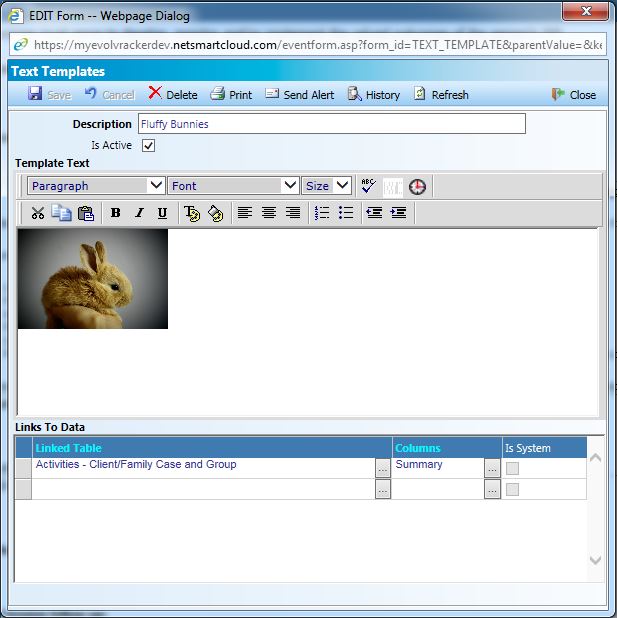
If you have entered syntactically correct HTML, after saving, you should see the image and not the text:

text-template-saved

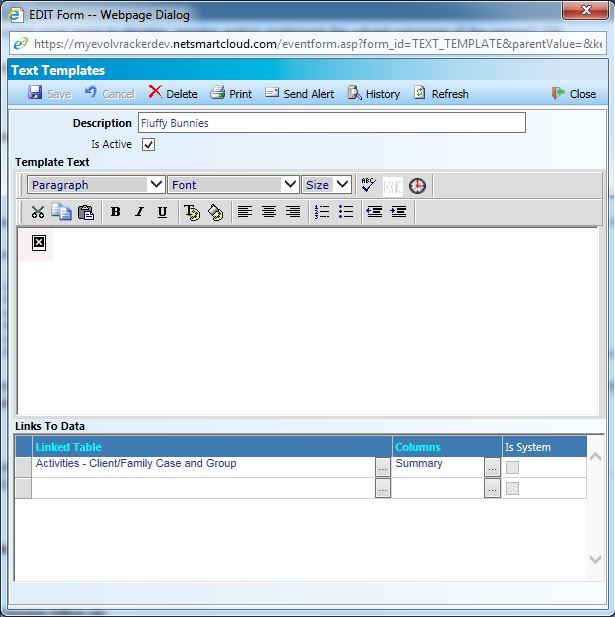
If you see this, then you need to start again:

text-template-broken-image

When you revisit the Text Templates area in the future, you may or may not seethe image rendered in the list of text templates but you should when you open a text template for editing or viewing.

Applying Text Template in Memo Field

When the clinician goes to add the image to the Memo field, they can select the text template that contains the image. Unfortunately, when they select the text template, they will see the markup that will render the image once the form has been saved and not the image.

memo-field-before-save

After saving, the image should appear. You can also add text in the same field to label the pictures or explain them.

memo-field-with-captions

We are using cookies on our website

Please confirm, if you accept our tracking cookies. You can also decline the tracking, so you can continue to visit our website without any data sent to third party services.