
myEvolv Tips: Custom Sort on User-Defined Fields

It is possible to display your user-defined picklist options in a custom order in myEvolv. This comes in handy when you are using a user-defined table for things like scales where the description would not naturally be in alphabetical order.

This recently came up for a form I was working on where the user needed to determine if a score on a test was

  • None
  • Low
  • Moderate/Low
  • Moderate
  • Moderate/High
  • High
  • Very High

When I created the User-Defined Table, the picklist displayed the options in alphabetical order, which is not an intuitive order for the user to see this kind of list displayed.

How can I get the picklist to display in the logical order? The answer lies in the user-defined table setup. In the table definition section, there is a field called “Order Expression”. It will take any SQL code that would follow ORDER BY in an order by clause.

The default value is description which means it will sort the description column in ascending order.

You could change the value to description desc to change the order to reverse-alphabetical.

You can also change which column the sort is applied to. With user-defined fields that means you can use the Shortcut Code, Standard Code or Generic Code columns. The trick is that you have to know the actual column name in the table. Here they are:

Shortcut Code = sc_code
Standard Code = std_code
Generic Code = gen_code

Keep in mind that the shortcut code is usually also displayed in the picklist and/or used on the form as a way of typing in the selection so you may or may not want to use that column as your sort column.

In my case, I went with using the Standard Code column. I simply put a number for each row in the order I wanted them to display and changed the Order Expression to std_code.

Setup like this, my picklist is now sorted in a logical fashion:

How To: Filter Activity Type and Encounter With Picklists

The activity_type_id and encounter_with_id columns in myEvolv’s Event Log table can come in handy when you are configuring events in myEvolv. If you don’t need to use these columns for their intended purpose, they are easily repurposed to hold other values and since they are event log fields, they can be pulled into the canned reports easily.

The picklist values for these two columns are configured in the Table Maintenance – Extended area of the Setup module.

activity-type-encounter-with-luts

You will notice that unlike the other lookup tables in myEvolv, these two have a Filter Code column.

filter-code-highlighted

Since these lookup tables are connected to Event Log fields that will be available to all events, the picklist could end up holding many more values than would apply to certain events or just more than you would want to display for a particular event. myEvolv provides the Filter Code column so that you can filter the picklist options on particular forms. The following is a guide for how to configure a filtered picklist.

Configure the Lookup Table

In my example, I am going to use the activity_type_id column to capture the method by which a clinician has contacted a family: Phone, Email, Text Message or In-Person

In the table maintenance for Services: Activity Types for Clients, I add an entry for each option and give all of the options a Filter Code of FN_ACT_TYPE

activity-type-lut-with-filter-code

Configure Form

Without filtering, I have the activity_type_id field on my form with the Activity Types for client services Look-up Table selected. When I go to open the picklist, I see the activity type look up table with all active options. The clinicians will need to search through the whole list to find one of the intended options.

unfiltered-picklist

In order to apply the filter, I first need to add a variable to the form. The variable should have a regular string Data Type. In my example, I have given the variable the name activity_type_filter and a caption of FN_ACT_TYPE. The variable also has a default value of ‘FN_ACT_TYPE’ (remember to include the single quotes when setting the default value). The default value must match the filter code that you used in the lookup table. I also toggled the Is Visible setting off so that it is not shown on the form.

variable-properties

Next I need to make the activity_type_id field on the form depend on the value of the variable.

In the Depends On (other) attribute, I add the following code:
getElementFromXML(formXML, 'activity_type_filter')
Note that the second argument is the name of the variable I created.

activity-type-properties

Now when I go to open the picklist, I will only see the options that have the filter code “FN_ACT_TYPE”.

filtered-picklist

Canned Reports

Because I used the activity_type_id, the values in this field will show up in many of the canned reports in myEvolv.

canned-report-activity-type

How To: Enable/Disable a Field Based on the Selected Value in a Picklist Field

Disable rules in myEvolv are one of the best methods we have available for controlling what data is collected during service entry.  There are a lot of forms in myEvolv that use checkboxes to enable and disable form fields but it is also possible to enable and disable form fields based on other criteria.

One of my programs needed some more logic built into how they were documenting the setting in which services were being provided.  They had been using a simple foreign key data field connected to a user defined lookup table to select a generic location.  They wanted to capture more specific locations in some cases without making drastic changes to the form.  My approach was to add two new fields to the form that would only be modifiable if certain options were selected in the generic location field.

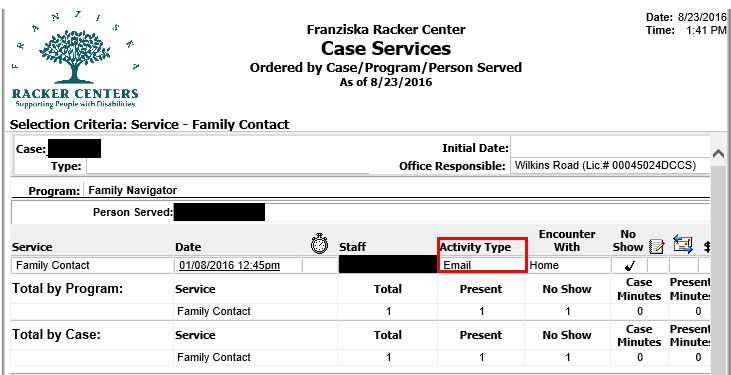
Here is how the location section of the form looked after adding the new fields.

picklist-default-empty

The “Location of Service” field is the generic location field that was already on the form.  “Non-FRC Location” is a foreign key field that links to a new user-defined lookup table that contains the more specific locations when “Non-FRC Preschool/UPK”, “Non-FRC School” or “Daycare” is selected in “Location of Service”.  “Community Location” is a custom string field where the clinician can type a more specific location when “Community location” is selected in “Location of Service”.  Both of the new fields are required so that when they become enabled, the clinician cannot forget to add the information that the program wants.

The code

The community location piece is simpler so we will look at that first.  To get the “Community Location” field to enable only when “Community location” is selected in the “Location of Service” field, I used the following code in the “Community Location” fields disable rule property:

document.getElementById('serv_loca').value != '36A0BC74-E4FE-43AA-BF0F-BB429D6C28D1'

How the code works

The disable rule in myEvolv works like an if-statement where you get to determine the conditions.  Whatever you put into the disable rule property will be evaluated and if the result is true, the field will be disabled and if the result is false, the field will be enabled.  The statement above will evaluate true (disable the field) if the value of the ‘serv_loca’ field is not equal to ‘Community location’.

picklist-community-enabled

A note on the GUIDs

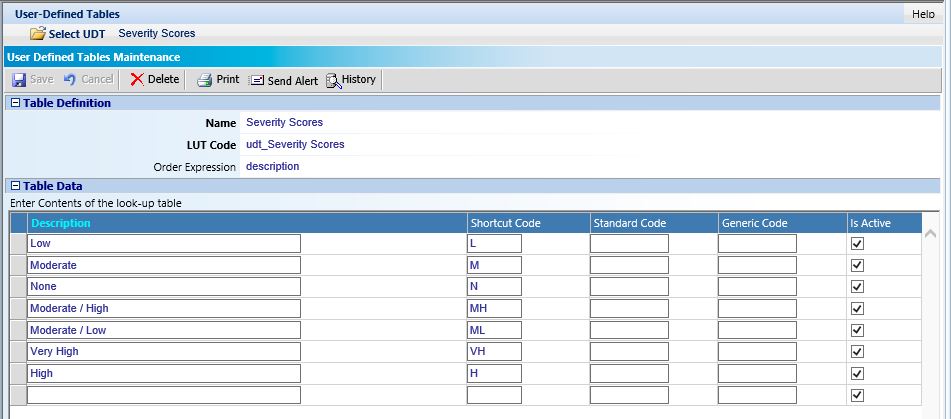
When you get the value of a foreign key field, the value is a foreign key and not the description or the code. That is why in the code, ‘Community location’ is actually ’36A0BC74-E4FE-43AA-BF0F-BB429D6C28D1′. You can check out my post on how to default a value on a picklist field for a method on how to find the foreign key value for items in your user defined lookup tables.

Adding complexity to the conditions

To get the “Non-FRC Location” field to enable only when one of three options is selected, the code needs to get a little more complex:

document.getElementById('serv_loca').value != '569B4372-5F51-492E-87EB-D1927EE714D4'
&& document.getElementById('serv_loca').value != 'E5AA86E2-C558-4423-9CE6-4D29B5489B76'
&& document.getElementById('serv_loca').value != '922BCDC4-DC91-4AC3-9949-3401AF509AE1'

How the more complex code works

Here, I am using the JavaScript logical operator && to say this statement should evaluate to true (that is, the field should be disabled) if the value of ‘serv_loca’ is not equal to ‘Day Care’ and not equal to ‘Non-FRC Preschool/UPK’ and not equal to ‘Non-FRC School’.  Based on how logical operators work, if a single one of those conditions is true, the entire statement evaluates as false and the field will be enabled.  You can also use the JavaScript “or” logical operator || to craft the conditional statement you need.

picklist-location-enabled

A note on ampersands

Another thing you might be wondering about is why I used && instead of JavaScript’s “and” logical operator &&. I explain this in a troubleshooting post that you can read here.

We are using cookies on our website

Please confirm, if you accept our tracking cookies. You can also decline the tracking, so you can continue to visit our website without any data sent to third party services.