
How To: Override a Field Value at Save

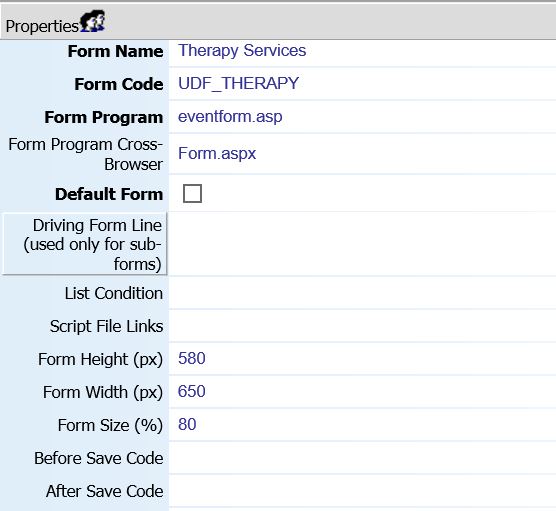
Besides the ‘On Load’, ‘On Click’, and ‘On Change’ events that myEvolv allows you to use as triggers for user defined scripts, each form itself has ‘Before Save Code’ and ‘After Save Code’ properties that also can be used to trigger scripts.  These can be useful if you want to apply some business logic to your forms in a way that is safe from modification by clinicians.  Take for example, this simple scenario:

You have a funder that wants no-show services submitted with a duration of 0 minutes.

Beyond simply instructing your clinicians to enter a ‘0’ for duration when the “No Show” checkbox is checked and crossing your fingers, you might approach the problem using the ‘On Click Script’ property for the is_noshow field.  You can write a simple script that checks if the checkbox is checked and if it is, it will put “0” in the duration field.  However, the clinicians are still able to go ahead and change that duration value to something else or even clear it out before they save the form, essentially overriding your business logic.  What would be better is for you to override their logic.  That is where the ‘Before Save Code’ and ‘After Save Code’ properties become useful.

before-save-after-save

‘Before Save Code’ fires after saving?!?

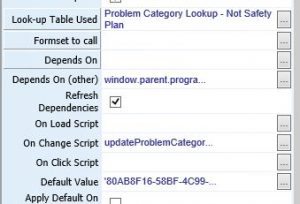
One thing that might be confusing when using these properties on your forms is understanding when the code that is associated with each property is executed.  The confusion stems from the conflation of clicking the ‘Save’ button on the form and actually executing its save algorithm.  The ‘Before Save Code’ fires after the Save button is clicked on the form but before myEvolv runs through its routines that takes the form data from your browser and enters it into the database.  ‘After Save Code’ fires after the save algorithm.  The ‘Before Save Code’ is the key to a solution to our scenario because we want to override some data on the form before myEvolv reads it into the database.

The code

if(document.getElementById('is_noshow').checked) setFormElement('duration', '00:00')

Some notes about the code

JavaScript usually likes the function body to be wrapped in curly brackets { and } but using them in ‘Before Save Code’ and ‘After Save Code’ properties throws an error related to XPath and XSLT. Leaving the brackets off does not.

Also, the second argument in the setFormElement call needs to be formatted precisely for myEvolv. When using the Duration(hh:mm) field on the form itself, if you enter a plain ‘0’, once you click out of the field, the form would resolve the value to ’00:00′. When using the ‘Before Save Code’ property, the form will not have the chance to perform that transformation so the value must be formatted properly in the code itself.

How the code works

The first part of the code is a simple if-statement to check if the is_noshow checkbox is checked. If it is, then a call is made to a Netsmart created setFormElement function that changes the duration field’s value to ’00:00′. The setFormElement function takes only two arguments: the name of the element and a value to set and can be used on any field on the form.

form-before-after

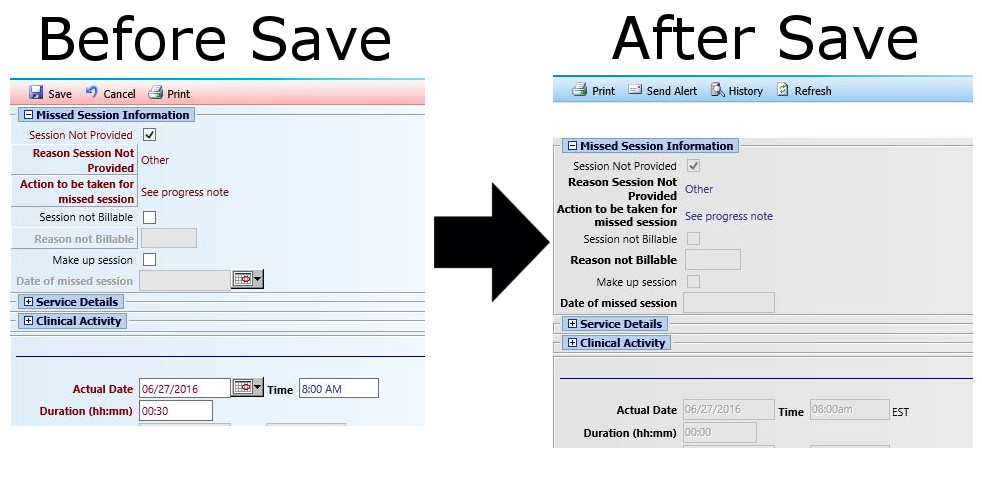
When the clinician opens the form, there will be no difference in the way that the form behaves and the clinician will be able to enter any duration he or she would like in the ‘Duration (hh:mm)’ field. Once the clinician hits the ‘Save’ button, the code will execute. If the clinician checked the “Session Not Provided” checkbox on the form (this is the label used on the is_noshow field in my example), then the value of ‘Duration (hh:mm)’ will be changed to ’00:00′ just before myEvolv runs its save routines. The clinician still will not see any difference until after the event is entered into the system. Re-opening the saved form will show that the ‘Duration (hh:mm)’ has been changed to ’00:00′ despite whatever duration had been entered by the clinician.

How To: Enable/Disable a Field Based on the Selected Value in a Picklist Field

Disable rules in myEvolv are one of the best methods we have available for controlling what data is collected during service entry.  There are a lot of forms in myEvolv that use checkboxes to enable and disable form fields but it is also possible to enable and disable form fields based on other criteria.

One of my programs needed some more logic built into how they were documenting the setting in which services were being provided.  They had been using a simple foreign key data field connected to a user defined lookup table to select a generic location.  They wanted to capture more specific locations in some cases without making drastic changes to the form.  My approach was to add two new fields to the form that would only be modifiable if certain options were selected in the generic location field.

Here is how the location section of the form looked after adding the new fields.

picklist-default-empty

The “Location of Service” field is the generic location field that was already on the form.  “Non-FRC Location” is a foreign key field that links to a new user-defined lookup table that contains the more specific locations when “Non-FRC Preschool/UPK”, “Non-FRC School” or “Daycare” is selected in “Location of Service”.  “Community Location” is a custom string field where the clinician can type a more specific location when “Community location” is selected in “Location of Service”.  Both of the new fields are required so that when they become enabled, the clinician cannot forget to add the information that the program wants.

The code

The community location piece is simpler so we will look at that first.  To get the “Community Location” field to enable only when “Community location” is selected in the “Location of Service” field, I used the following code in the “Community Location” fields disable rule property:

document.getElementById('serv_loca').value != '36A0BC74-E4FE-43AA-BF0F-BB429D6C28D1'

How the code works

The disable rule in myEvolv works like an if-statement where you get to determine the conditions.  Whatever you put into the disable rule property will be evaluated and if the result is true, the field will be disabled and if the result is false, the field will be enabled.  The statement above will evaluate true (disable the field) if the value of the ‘serv_loca’ field is not equal to ‘Community location’.

picklist-community-enabled

A note on the GUIDs

When you get the value of a foreign key field, the value is a foreign key and not the description or the code. That is why in the code, ‘Community location’ is actually ’36A0BC74-E4FE-43AA-BF0F-BB429D6C28D1′. You can check out my post on how to default a value on a picklist field for a method on how to find the foreign key value for items in your user defined lookup tables.

Adding complexity to the conditions

To get the “Non-FRC Location” field to enable only when one of three options is selected, the code needs to get a little more complex:

document.getElementById('serv_loca').value != '569B4372-5F51-492E-87EB-D1927EE714D4'
&& document.getElementById('serv_loca').value != 'E5AA86E2-C558-4423-9CE6-4D29B5489B76'
&& document.getElementById('serv_loca').value != '922BCDC4-DC91-4AC3-9949-3401AF509AE1'

How the more complex code works

Here, I am using the JavaScript logical operator && to say this statement should evaluate to true (that is, the field should be disabled) if the value of ‘serv_loca’ is not equal to ‘Day Care’ and not equal to ‘Non-FRC Preschool/UPK’ and not equal to ‘Non-FRC School’.  Based on how logical operators work, if a single one of those conditions is true, the entire statement evaluates as false and the field will be enabled.  You can also use the JavaScript “or” logical operator || to craft the conditional statement you need.

picklist-location-enabled

A note on ampersands

Another thing you might be wondering about is why I used && instead of JavaScript’s “and” logical operator &&. I explain this in a troubleshooting post that you can read here.

*ARCHIVE* How To: Default a Date Field Value Based on Another Date Field

NOTE: THIS POST CONTAINS OBSOLETE CODE THAT WILL NOT WORK IN NX. I WILL KEEP THE POST AVAILABLE SINCE IT MAY PROVIDE SOME INSIGHT IN HOW TO USE JAVASCRIPT TO MANIPULATE MYEVOLV FORMS. YOU CAN FIND THE UPDATED VERSION OF THIS POST HERE.

When working on treatment plans in myEvolv, you will notice that many of the treatment plan component forms contain both a start date and a target completion date.  One of the programs I was building a treatment plan for wanted to have the target completion date on the form but always wanted it to be 90 days from the start date.  Instead of making each clinician calculate 90 days from the start date and fill it in themselves, I used this method to take the date value from the start date and update the target completion date field with a value that is 90 days later.  I will walk you through the JavaScript that I used so that you can make adjustments based on your needs.  The full snippet of JavaScript will be at the end.

two-fields

Where does the code go?

The first consideration is where to put the JavaScript.  In this case, used the ‘On Change Script’ field property on the field that will be modified by the clinician, ‘start_date’.  myEvolv provides us with access to 3 events that we can use to trigger our JavaScript handlers (the code we want to execute):  ‘On Change’, ‘On Click’ and ‘On Load’.  The ‘On Change’ event is fired when the value of the field has been changed.  This is the most suitable event to use in this situation since I do not want the new date value to calculate until there is a value in the first date field.  Furthermore, if a clinician makes a mistake entering the start date, I want the new date to recalculate when the clinician makes an adjustment.  Both of these scenarios are covered when using the ‘On Change’ event.

Get the ‘start_date’

The first line of JavaScript code’s purpose is to get the value that has been placed into the ‘start_date’ field and convert it into a proper JavaScript Date object so that we can manipulate the date easily. I decalred a variable named date and set it to be a new Date object passing the value of the ‘start_date’ field as its argument:

var date = new Date(document.getElementById('start_date').value);

Calculate a New Date

Now with the date entered by the clinician converted to a Date object, I can perform some calculations on the date using the ‘getter’ and ‘setter’ methods built in to JavaScript Date objects. In my scenario, I need the ‘target_date’ field to be +90 days from the ‘start_date’ so I used the getDate() and setDate() methods:

date.setDate(date.getDate() + 90);

If I wanted to do +3 months instead, I would use the getMonth() and setMonth() methods:

date.setMonth(date.getMonth() + 3);

If I wanted to do +1 year, I would use the getFullYear() and setFullYear() methods:

date.setFullYear(date.getFullYear() + 1);

There are also methods for getting and setting hours, minutes, seconds, and milliseconds, but I am dealing with Date Only fields in this scenario.

Format the New Date

Now that the date object has my new date stored in it, I need to put that value into the ‘target_date’ field. However, the date in the date object is not formatted in a way that myEvolv’s date fields like so I need to pull the individual date elements from the object and build a string value to place in the date field. I accomplish this first by declaring variables for the month, day and year:

var mm = date.getMonth() + 1;//+1 is needed because in JavaScript Date objects, January is 0
var dd = date.getDate();
var yyyy = date.getFullYear();

Now I declare a new variable called formatted_date and set its value to a concatenated myEvolv-friendly string:

var formatted_date = mm + '/' + dd + '/' + yyyy;

Set the ‘target_date’

Next I can put this string into the field on the form. Since I will do a few things to the ‘target_date’ field, I am going to create a variable called target_date to refer to it more quickly:

var target_date = document.getElementById('target_date');
target_date.value = formatted_date;

Awaken the ‘target_date’ Field

You might think that you are done here because the new date has been loaded into the form, however, because I used JavaScript to update the value of ‘target_date’, the form itself does not recognize that a change has been made to ‘target_date’ which is indicated by the form label and field value text turning red. Even though the value is in the form field, upon saving, the form will not recognize the field as having a new value and will not include it in its save operation. One way to fix that is to manually click in the ‘target_date’ field and then click out of it so that the form recognizes a change in the value of the field but that is un-intuitive and error-prone. Luckily, JavaScript provides a method for simulating this with the focus() and blur() methods to use on form fields:

target_date.focus();
target_date.blur();

With these two lines at the end, after the new date value has been filled in on the ‘target_date’ field, the field label turns red which means that the form has recognized that its value has changed and it will include the change when the form is saved.

two-fields-filled

One Caveat

You may be inclined to disable the ‘target_date’ form field so that clinicians cannot change the value after it has been calculated. I was unable to get that to work, however. When a form field is disabled, it is excluded from being saved so for now it would seem that you have to keep the form field modifiable. If you used this same similar* code in the ‘On Change Script’ property for ‘target_date’, you could prevent the ‘target_date’ from being changed by effectively reverting any attempts at changing the ‘target_date’ manually.

*You will need to also add some JavaScript to validate that the ‘target_date’ has been changed because if you just put this exact same code in the ‘On Change Script’ property for ‘target_date’, you will end up in an infinite loop when ‘actual_date’ is changed on the form and you will crash the browser.

The Full Code

var date = new Date(document.getElementById('start_date').value);
date.setDate(date.getDate() + 90);
var mm = date.getMonth() + 1;
var dd = date.getDate();
var yyyy = date.getFullYear();
var formatted_date = mm + '/' + dd + '/' +yyyy;
var target_date = document.getElementById('target_date');
target_date.value = formatted_date;
target_date.focus();
target_date.blur();

*ARCHIVE* How To: Default Value in Picklist Field

NOTE: An updated version of this post for myEvolv NX is available here: How To: Default Value for Picklist Field

You may find that a myEvolv form that you wish to use contains a picklist field that cannot be done away with even though the user is always going to be selecting the same item.  For instance, you may have a treatment plan for a program where there is only one category of goals but you have to select that category manually anyways.  Just like other fields in myEvolv, you have the option of setting a default value for a picklist field but it is a little trickier to setup than it is for text and date fields.  Defaulting values for picklist fields where there are no real choices to be made will save your clinicians time when doing their work in myEvolv.

Some picklist fields have both a button that opens the picklist dialog and a place to type a code, which allows for faster entry for users who know the codes.

category-empty

You might think that you can designate a default value in the form designer in the same way that you designate a default value in a text field since there is a sort of text field available.  If you try that, however, you will find that this does not work.  The difference is that this field is actually used to store a foreign key value and so the default value must be a foreign key (the GUID) and not the description or code values for the item that you wish to default in.  Remember to place it within single quotes as you would a default text value.

default-value-filled

In my example, I needed the GUID for a custom treatment category named “Day Treatment”.  Looking at the field properties for this picklist field, I see that the Lookup table that is being used is ‘Problem Category Lookup – Not Safety Plan’, which tells me that I need to take a look at the ‘problem category’ table.

picklist-field-properties

I pulled that table into Crystal Reports and made a quick and dirty report that shows the problem_category_id and the description and grabbed the GUID that corresponds with my Day Treatment category.

guid-crystal-reports

With the GUID used as the default value on the picklist field, now ‘Day Treatment’ is the default value on the treatment plan whenever a new Category component is added to the treatment plan.

category-filled

We are using cookies on our website

Please confirm, if you accept our tracking cookies. You can also decline the tracking, so you can continue to visit our website without any data sent to third party services.